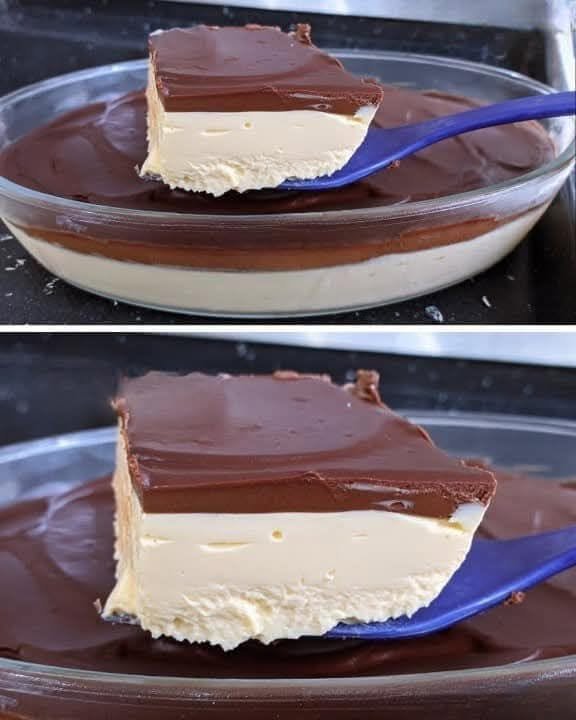
Layered No Bake Cheesecake
Layered no bake cheesecake is a rich, creamy, and beautiful dessert that is perfect for any occasion. It has soft cheesecake layers, a delicious crust, and colorful fillings that create an eye catching presentation. Since it does not require an oven, it is a wonderful dessert for warm days when you want something sweet without heating up the kitchen.
Many people love layered no bake cheesecake because it is simple to make and tastes amazing. The smooth cream cheese filling blends perfectly with a buttery cookie crust. The layers can be made with fruit, chocolate, or other flavors, giving you endless options to create a dessert that suits your taste. Every slice looks impressive, making it ideal for birthdays, family gatherings, holidays, and celebrations.
Another great thing about this recipe is that it can be prepared ahead of time. The cheesecake needs time to chill in the refrigerator, which makes it a convenient dessert for busy schedules. Once set, it becomes firm enough to slice while remaining creamy and smooth. Whether you are a beginner or an experienced home cook, this layered no bake cheesecake is easy to prepare and sure to impress everyone who tries it.
Cooking Time and Serving
| Details | Time |
|---|---|
| Preparation Time | 30 minutes |
| Chilling Time | 6 hours |
| Total Time | 6 hours 30 minutes |
| Servings | 12 servings |
Ingredients
For the Crust
- 2 cups graham cracker crumbs
- 1/2 cup melted butter
- 2 tablespoons granulated sugar
For the Cheesecake Filling
- 24 ounces cream cheese, softened
- 1 cup powdered sugar
- 2 teaspoons vanilla extract
- 2 cups heavy whipping cream
For the Strawberry Layer
- 1 cup strawberry puree
- 2 tablespoons powdered sugar
For the Blueberry Layer
- 1 cup blueberry puree
- 2 tablespoons powdered sugar
For Garnish
- Fresh strawberries
- Fresh blueberries
- Whipped cream
- Crushed graham crackers
How to Make Layered No Bake Cheesecake
Step 1: Prepare the Crust
In a mixing bowl, combine the graham cracker crumbs, melted butter, and sugar. Stir until the mixture resembles wet sand.
Step 2: Form the Crust
Press the mixture firmly into the bottom of a 9 inch springform pan. Use the back of a spoon or a flat measuring cup to create an even layer.
Step 3: Chill the Crust
Place the crust in the refrigerator while preparing the filling. This helps it firm up.
Step 4: Beat the Cream Cheese
In a large mixing bowl, beat the softened cream cheese until smooth and creamy.
Step 5: Add Sugar and Vanilla
Add the powdered sugar and vanilla extract. Continue mixing until fully combined.
Step 6: Whip the Cream
In a separate bowl, whip the heavy cream until stiff peaks form.
Step 7: Combine the Mixtures
Gently fold the whipped cream into the cream cheese mixture. Mix carefully to keep the filling light and fluffy.
Step 8: Divide the Filling
Divide the cheesecake filling evenly into three bowls.
Step 9: Make the Strawberry Layer
Mix the strawberry puree and powdered sugar into one bowl of cheesecake filling.
Step 10: Make the Blueberry Layer
Mix the blueberry puree and powdered sugar into the second bowl of cheesecake filling.
Step 11: Leave One Layer Plain
Keep the third bowl plain for a classic cheesecake layer.
Step 12: Add the First Layer
Remove the crust from the refrigerator. Spread the plain cheesecake filling evenly over the crust.
Step 13: Add the Strawberry Layer
Carefully spread the strawberry cheesecake mixture over the plain layer.
Step 14: Add the Blueberry Layer
Spread the blueberry cheesecake mixture evenly over the strawberry layer.
Step 15: Smooth the Top
Use a spatula to smooth the surface.
Step 16: Chill the Cheesecake
Cover the pan and place it in the refrigerator for at least 6 hours or overnight.
Step 17: Remove from the Pan
Once fully chilled, carefully release the springform pan.
Step 18: Decorate
Top with whipped cream, fresh strawberries, blueberries, and graham cracker crumbs.
Step 19: Slice and Serve
Cut into slices and serve chilled.
Why You Will Love This Recipe
No Oven Needed
This dessert requires no baking, making it easy and convenient.
Beautiful Layers
The colorful layers create a stunning appearance that looks impressive on any dessert table.
Creamy Texture
Each bite is rich, smooth, and incredibly satisfying.
Perfect for Parties
The recipe serves many people and can be prepared ahead of time.
Easy to Customize
You can change the fruit flavors or add chocolate for a unique version.
Recipe Notes
- Use full fat cream cheese for the best texture.
- Make sure the cream cheese is softened before mixing.
- Chill the cheesecake long enough to allow it to set properly.
- Fresh fruit puree provides the best flavor.
- Fold the whipped cream gently to keep the filling light.
- A springform pan makes removal much easier.
- Store leftovers in the refrigerator.
- Serve cold for the best taste and texture.
Flavor Variations
Chocolate Layered Cheesecake
Add melted chocolate to one of the cheesecake layers for a rich chocolate flavor.
Mango Cheesecake
Replace the fruit layers with fresh mango puree.
Lemon Cheesecake
Mix fresh lemon juice and lemon zest into one layer.
Raspberry Cheesecake
Use raspberry puree instead of strawberry puree.
Cookies and Cream Cheesecake
Fold crushed sandwich cookies into one layer for extra crunch and flavor.
Storage Tips
Store layered no bake cheesecake in an airtight container or cover the pan tightly with plastic wrap. Keep refrigerated for up to 4 days.
For longer storage, freeze individual slices in freezer safe containers. Thaw in the refrigerator before serving.
Best Occasions for Layered No Bake Cheesecake
- Birthday parties
- Family gatherings
- Holiday celebrations
- Summer picnics
- Potluck dinners
- Baby showers
- Bridal showers
- Weekend desserts
Its colorful appearance and creamy texture make it suitable for almost any event.
Tips for the Perfect Layered No Bake Cheesecake
Use room temperature cream cheese to avoid lumps. Always whip the cream until stiff peaks form before folding it into the filling. When adding each layer, spread gently to maintain clean and even sections.
For the neatest slices, chill the cheesecake overnight. Wipe the knife clean between cuts to create beautiful layers in every serving.
Frequently Asked Questions
What is a layered no bake cheesecake?
It is a cheesecake made without baking that contains multiple flavored layers stacked on top of each other.
Can I make this cheesecake ahead of time?
Yes. In fact, making it a day ahead helps it set better and improves the texture.
Can I use frozen fruit?
Yes. Thaw and drain the fruit before making the puree.
How long does it last in the refrigerator?
It can be stored in the refrigerator for up to 4 days.
Can I freeze no bake cheesecake?
Yes. Wrap it well and freeze for up to 2 months.
Why is my cheesecake too soft?
The cheesecake may need more chilling time. Make sure it chills for at least 6 hours.
Can I use a different crust?
Yes. Cookie crumbs, vanilla wafers, or digestive biscuits work well.
Do I need a springform pan?
It is recommended because it makes serving easier, but other deep pans can also be used.
Can I reduce the sugar?
Yes. Adjust the sweetness according to your preference.
What toppings go well with this cheesecake?
Fresh fruit, whipped cream, chocolate shavings, fruit sauce, and cookie crumbs are all excellent choices.
Nutrition Information
Whole Recipe Nutrition Estimate
| Nutrient | Amount |
|---|---|
| Calories | 6100 |
| Protein | 78 g |
| Carbohydrates | 460 g |
| Sugars | 315 g |
| Fat | 455 g |
| Saturated Fat | 275 g |
| Fiber | 10 g |
| Sodium | 3400 mg |
| Calcium | 1100 mg |
Nutrition Per Serving
Based on 12 servings.
| Nutrient | Amount Per Serving |
|---|---|
| Calories | 508 |
| Protein | 6.5 g |
| Carbohydrates | 38 g |
| Sugars | 26 g |
| Fat | 38 g |
| Saturated Fat | 23 g |
| Fiber | 1 g |
| Sodium | 283 mg |
| Calcium | 92 mg |
Serving Suggestions
Layered no bake cheesecake tastes wonderful on its own, but you can make it even more special with simple additions. Serve it with fresh berries, fruit sauces, whipped cream, or a cup of coffee. For celebrations, decorate the top with colorful fruit patterns to match the event theme.
You can also create individual servings by assembling the cheesecake in clear dessert cups. This presentation is perfect for parties and allows guests to see the beautiful layers.
Conclusion
Layered no bake cheesecake is a simple yet elegant dessert that combines creamy cheesecake filling, a buttery crust, and colorful fruit layers into one delicious treat. It requires no baking, making it a convenient option for home cooks of all skill levels. The smooth texture and vibrant appearance make it a favorite for holidays, parties, and everyday desserts.
Because it can be customized with different flavors and prepared ahead of time, this recipe is both practical and versatile. Once you try this layered no bake cheesecake, it may become one of your favorite desserts to make and share with family and friends.
Disclaimer
This recipe is intended for general informational purposes only. Enjoy desserts in moderation as part of a balanced diet. Nutrition values are estimates and may vary based on ingredient brands and portion sizes. Always check ingredient labels for possible allergens such as dairy, gluten, or other ingredients that may cause allergic reactions. If you have food allergies or dietary concerns, consult a qualified healthcare professional before consuming this recipe.