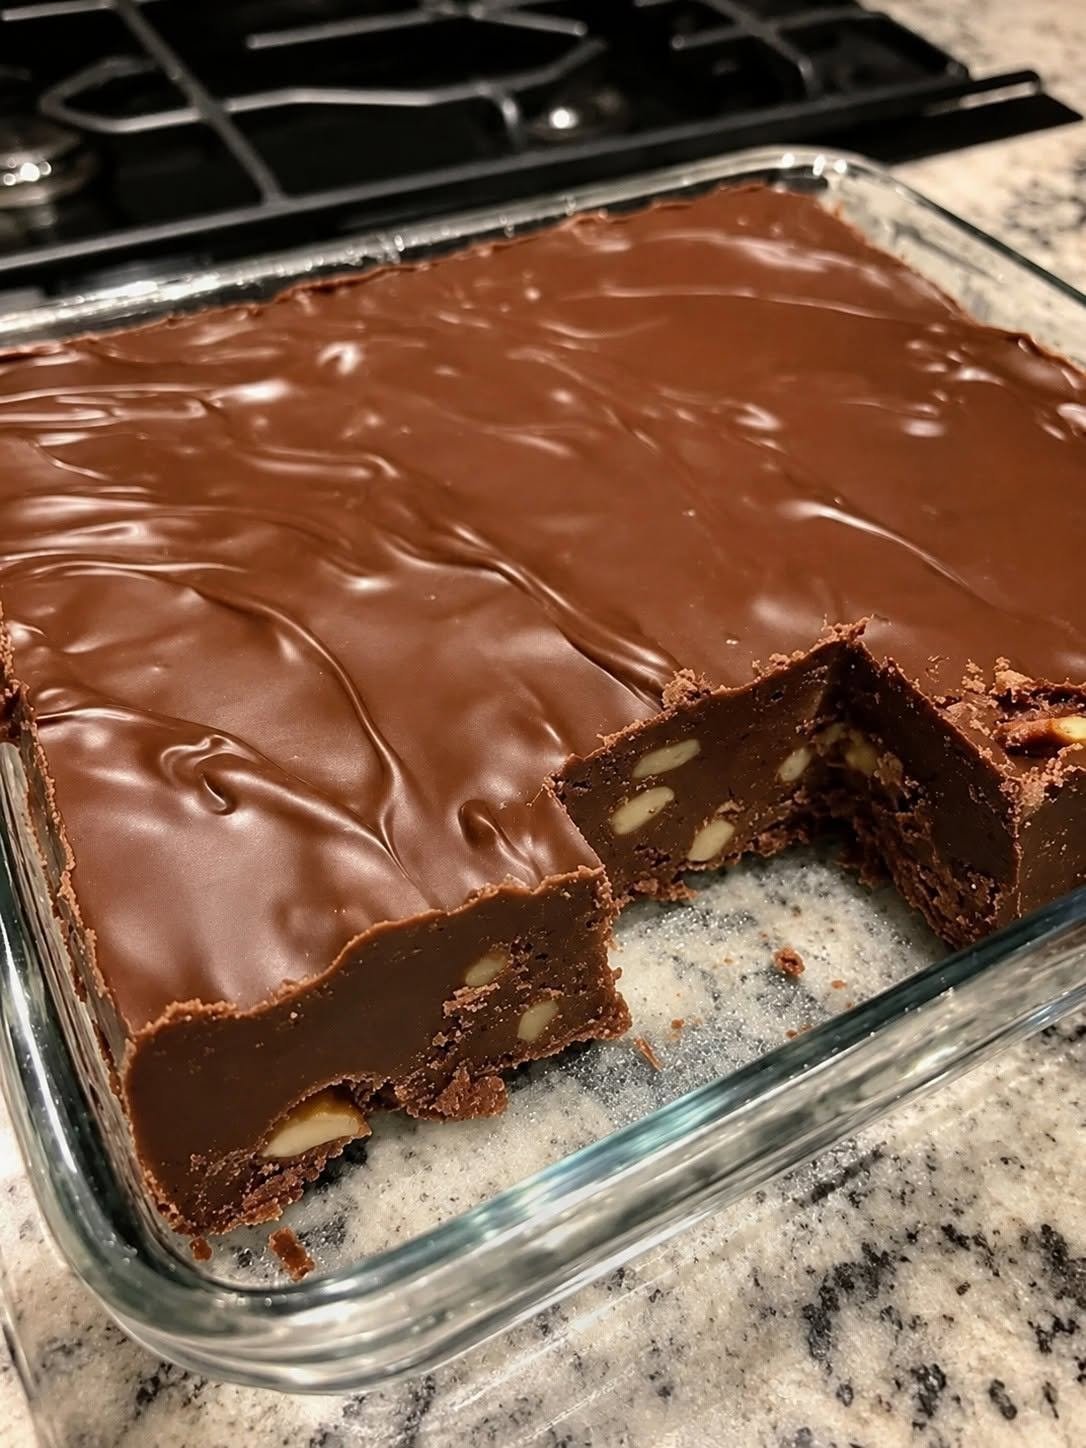
5-Minutes Fudge Recipe – The Easiest Creamy Chocolate Fudge You’ll Ever Make
Introduction: A Chocolate Treat That Feels Like a Warm Hug
There are those moments when a chocolate craving hits out of nowhere. Maybe it’s after a long day, during a rainy afternoon, or when unexpected guests announce they’re “just five minutes away.” That’s exactly when this 5-Minutes Fudge becomes a little kitchen miracle.
Imagine rich, velvety chocolate slowly melting into a silky mixture that fills your kitchen with the irresistible aroma of cocoa and vanilla. Every bite is incredibly smooth, creamy, and melt-in-your-mouth delicious, with just the right amount of sweetness. The best part? You don’t need candy-making experience, a thermometer, or hours of waiting.
This recipe has become a favorite because it transforms a handful of pantry staples into a luxurious homemade dessert in almost no time. Whether you’re making holiday gifts, satisfying a midnight chocolate craving, or preparing a quick dessert for family, this foolproof fudge never disappoints.
If you’ve always believed homemade fudge was difficult, prepare to be pleasantly surprised.
Why You’ll Love This Recipe
This recipe checks every box for the perfect homemade dessert.
- 🍫 Ready in just 5 minutes of active preparation
- 🥣 Only a handful of everyday ingredients
- 💰 Budget-friendly and much cheaper than store-bought fudge
- 👨👩👧 Perfect for kids to help make
- 🎁 Makes a wonderful edible gift
- ❄️ Stores beautifully in the refrigerator or freezer
- ✨ Rich, creamy, smooth texture every time
- 🌱 Easy to customize for vegan, dairy-free, or healthier versions
- 🍬 Great for holidays, birthdays, parties, and bake sales
- 💯 Beginner-friendly with no special candy-making skills required
Ingredients (With Exact Measurements)
Main Ingredients
- 2 cups semi-sweet chocolate chips (340 g | 12 oz)
- 1 can sweetened condensed milk (397 g | 14 oz)
- 2 tablespoons unsalted butter (28 g | 1 oz)
- 1 teaspoon vanilla extract (5 ml)
- ¼ teaspoon fine sea salt (1 g)
Optional Mix-Ins
- ½ cup chopped walnuts (60 g | 2 oz)
- ½ cup pecans (55 g | 2 oz)
- ½ cup mini marshmallows (25 g | 1 oz)
- ¼ cup crushed peppermint candies (35 g)
- ¼ cup shredded coconut (20 g)
Healthy Substitutes
- Replace semi-sweet chocolate with dark chocolate (70% cocoa) for less sugar.
- Use coconut condensed milk for a dairy-free option.
- Swap butter with coconut oil or vegan butter.
- Add chopped almonds, pistachios, or pumpkin seeds for extra nutrition.
- Stir in chia seeds or flaxseed for added fiber.
Nutritional Information (Per Serving)
(Based on 16 servings.)
| Nutrient | Amount |
|---|---|
| Calories | 180 kcal |
| Protein | 3 g |
| Carbohydrates | 21 g |
| Sugars | 19 g |
| Fat | 10 g |
| Saturated Fat | 6 g |
| Fiber | 2 g |
| Sodium | 40 mg |
| Calcium | 70 mg |
| Iron | 1.2 mg |
Dietary Information
- Vegetarian ✔
- Gluten-Free ✔ (check chocolate labels)
- Keto ✖
- Vegan ✖ (can be made vegan with substitutions)
- Nut-Free ✔ (unless adding nuts)
Kitchen Tools Needed
You won’t need fancy equipment.
- Medium microwave-safe bowl or saucepan
- Silicone spatula
- Measuring cups and spoons
- 8×8-inch (20×20 cm) square baking pan
- Parchment paper
- Sharp knife
- Refrigerator
Optional:
- Double boiler
- Digital kitchen scale
Step-by-Step Preparation
Step 1: Prepare the Pan
Line an 8×8-inch square pan with parchment paper, leaving some overhang on the sides. This makes removing the fudge effortless later.
Pro Tip: Lightly grease the parchment so the fudge releases perfectly.
Step 2: Melt the Chocolate
Microwave Method
Combine:
- chocolate chips
- sweetened condensed milk
- butter
Microwave on medium power for 30-second intervals, stirring after each interval.
Usually, it takes 1½–2 minutes total.
Stovetop Method
Heat over low heat, stirring continuously until everything melts into a glossy mixture.
Texture Cue: The mixture should be thick, shiny, and completely smooth.
Step 3: Add Flavor
Remove from the heat.
Stir in:
- vanilla extract
- salt
If using mix-ins, gently fold them in now.
Don’t overmix—the goal is a silky consistency.
Step 4: Spread into the Pan
Pour the warm fudge into the prepared pan.
Use a spatula to smooth the surface evenly.
Tap the pan gently on the counter to remove air bubbles.
Step 5: Chill
Although the preparation takes only five minutes, the fudge needs time to firm up.
Refrigerate for:
- 2 hours, or
- until completely set.
For quicker results, freeze for about 45 minutes.
Step 6: Slice
Lift the fudge from the pan using the parchment.
Use a sharp knife to cut into neat squares.
For perfectly clean cuts, wipe the knife between slices.
Expert Cooking Tips & Mistakes to Avoid
1. Don’t Overheat the Chocolate
Chocolate scorches easily.
Always melt gently and stir frequently.
2. Use Good-Quality Chocolate
Since chocolate is the main ingredient, better chocolate creates noticeably richer flavor.
3. Measure Carefully
Too much condensed milk creates overly soft fudge.
Too little makes it dry and crumbly.
4. Don’t Skip the Salt
A tiny amount balances sweetness and deepens the chocolate flavor.
5. Let It Set Completely
Cutting too early results in sticky, messy squares.
Patience pays off.
6. Avoid Moisture
Even a few drops of water can make melted chocolate seize.
Keep bowls and utensils completely dry.
7. Add Mix-Ins Last
Adding nuts or marshmallows before melting prevents the mixture from becoming smooth.
Variations & Customizations
Spicy Chocolate Fudge
Love bold flavors?
Mix in:
- ½ teaspoon cinnamon
- pinch of cayenne pepper
- pinch of chili powder
The gentle heat beautifully complements the rich chocolate.
Healthy Version
Make your fudge a little more nutritious.
Use:
- dark chocolate (70–85%)
- coconut condensed milk
- chopped almonds
- flaxseed
- pumpkin seeds
Reduce sweetness while boosting nutrients.
Kids-Friendly Version
Children love colorful surprises.
Mix in:
- rainbow sprinkles
- mini marshmallows
- crushed cookies
- colorful candy-coated chocolates
Top with extra sprinkles before chilling for a festive finish.
Storage & Reheating Instructions
Refrigerator
Store in an airtight container.
Keeps fresh for:
2–3 weeks
Separate layers with parchment paper.
Freezer
Freeze in freezer-safe containers for up to:
3 months
Thaw overnight in the refrigerator before serving.
Reheating
Fudge is best enjoyed chilled or at room temperature.
If you prefer a softer texture, let it sit at room temperature for 10–15 minutes before eating.
Avoid microwaving individual pieces, as they melt quickly.
Serving Suggestions
This rich chocolate fudge pairs wonderfully with:
- Fresh strawberries
- Vanilla ice cream
- Espresso
- Cappuccino
- Hot chocolate
- Cold milk
- Salted caramel sauce
- Fresh raspberries
- Whipped cream
- Crushed roasted nuts
For parties, arrange the fudge on a dessert platter with brownies, cookies, and chocolate-covered strawberries for an impressive homemade dessert spread.
During the holidays, package squares in decorative tins or gift boxes tied with ribbon—they make thoughtful homemade gifts that everyone loves.
Frequently Asked Questions
1. Why didn’t my fudge set?
Usually, this happens because there was too much liquid or the fudge wasn’t chilled long enough. Refrigerate for at least two hours before slicing.
2. Can I use milk chocolate instead?
Absolutely! Milk chocolate creates a sweeter, creamier fudge. Dark chocolate produces a richer, more intense flavor.
3. Can I make this recipe vegan?
Yes. Use dairy-free chocolate chips, vegan butter, and sweetened coconut condensed milk for a delicious vegan version.
4. Do I need a candy thermometer?
No. That’s one of the best things about this recipe. Since there’s no sugar syrup to cook, a thermometer isn’t necessary.
5. Can I add peanut butter?
Definitely. Swirl ¼ to ½ cup (60–120 g) creamy peanut butter into the melted chocolate before chilling for a delicious chocolate-peanut butter fudge.
6. Why is my fudge grainy?
Graininess usually results from overheating the chocolate or using low-quality chocolate chips. Melt slowly over low heat or in short microwave bursts, stirring often.
7. Can I double the recipe?
Yes. Simply double all ingredients and pour the mixture into a 9×13-inch (23×33 cm) pan. Chilling time may increase slightly.
Final Thoughts: Your New Favorite Chocolate Treat
Sometimes the simplest recipes become the ones you treasure most, and this 5-Minutes Fudge is proof that incredible desserts don’t have to be complicated. With just a few pantry staples and five minutes of hands-on time, you’ll have a batch of rich, creamy chocolate fudge that’s perfect for sharing—or keeping all to yourself.
Whether you’re making it for the holidays, gifting it to friends, packing it for a party, or enjoying a quiet chocolate moment at home, this recipe is one you’ll return to again and again. Every silky, chocolatey bite delivers homemade comfort that’s hard to resist.
So gather your ingredients, whip up a batch, and discover just how effortless homemade fudge can be. If you try this recipe, leave a comment with your favorite mix-ins, share it with fellow chocolate lovers, and spread the sweetness by posting your creations on social media. Happy fudge making! 🍫