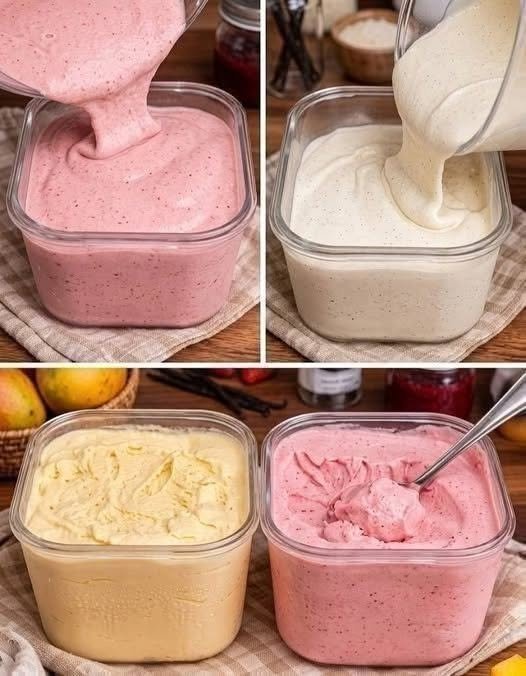
The Joy of Homemade Ice Cream
Imagine walking out on a warm summer afternoon and treating yourself to a cold, creamy scoop of sweet vanilla ice cream. There is something truly magical about making your own ice cream right in your kitchen. Store bought tubs can often taste artificial, overly sugary, or lack that deep, rich creaminess you dream about. When you make your own ice cream, you control every single ingredient, ensuring a pure and delicious dessert that brings a smile to everyone’s face.
Traditional homemade ice cream relies on a simple blend of heavy cream, whole milk, sugar, and vanilla. As the ingredients churn and freeze together, they transform into a velvety smooth treat that melts instantly on your tongue. You do not even need an expensive machine to get fantastic results, as simple freezer methods work wonderfully well for home bakers and dessert lovers alike.
Whether you are hosting a birthday party, celebrating a sunny weekend, or just craving a sweet nightcap, this classic recipe is wonderfully easy to follow. You only need a few basic ingredients to create a batch of pure happiness. Let us dive into the details and learn how to make delicious homemade ice cream step by step.
Cooking Time and Serving Information
-
Prep time: 15 minutes
-
Chill time: 4 hours
-
Total time: 4 hours and 15 minutes
-
Servings: 6 people
-
Yield: About 4 cups of ice cream
The Recipe Ingredients
Gather these simple ingredients before you begin. Using high-quality dairy makes all the difference for a rich texture.
-
Heavy cream: 2 cups of heavy whipping cream, kept cold
-
Whole milk: 1 cup of whole milk
-
Sugar: Three quarters of a cup of granulated white sugar
-
Vanilla extract: 2 teaspoons of pure vanilla extract or one scraped vanilla bean
-
Salt: A tiny pinch of salt to enhance all the sweet flavors
How to Make Homemade Ice Cream
Follow these clear steps to create a creamy, dreamy dessert right at home.
Step 1: Whisk the Milk and Sugar
Start by taking a large mixing bowl. Add your whole milk, granulated sugar, and a tiny pinch of salt. Whisk the mixture vigorously for about two minutes until all the sugar crystals dissolve completely into the milk.
Step 2: Add the Cream and Vanilla
Pour your cold heavy whipping cream and pure vanilla extract into the bowl with the milk mixture. Whisk everything together gently until the liquids are fully combined and smooth.
Step 3: Chill the Base
Cover your mixing bowl tightly with plastic wrap and place it in the refrigerator for at least two hours. Chilling your base mixture thoroughly is very important because it helps the ice cream freeze much faster and prevents ice crystals from forming.
Step 4: Churn or Freeze
If you have an ice cream maker, pour the chilled mixture into your machine and churn it according to the manufacturer instructions for about 20 to 25 minutes until it thickens into soft serve. If you do not have a machine, pour the chilled mixture into a shallow metal pan and place it in the freezer, stirring it vigorously with a fork every 30 minutes for two hours to break up ice crystals.
Step 5: Harden the Ice Cream
Transfer your churned ice cream into a freezer safe container with a tight fitting lid. Place it in the freezer for another two hours until it firms up enough to scoop easily.
Step 6: Scoop and Serve
Scoop your homemade ice cream into bowls or waffle cones and serve it immediately while it is cold and creamy.
Helpful Chef Notes
-
Keep everything cold: Make sure your dairy ingredients stay cold in the refrigerator until you are ready to mix them.
-
Mix-in ideas: Feel free to fold in chocolate chips, crushed cookies, or fresh fruit during the last few minutes of churning for extra flavor.
-
Storage tip: Store your ice cream container toward the back of the freezer where the temperature stays coldest to prevent freezer burn.
Frequently Asked Questions
Can I make this ice cream without an ice cream machine?
Yes, you can use the hand stirring method in a shallow pan in the freezer, or you can whip your heavy cream into stiff peaks before gently folding it into the sweetened milk for a no-churn version.
Can I use low fat milk instead of whole milk?
Whole milk and heavy cream provide the essential fat content needed to keep the ice cream smooth and creamy. Using low fat milk will result in an icy texture rather than a creamy one.
How long does homemade ice cream last in the freezer?
Homemade ice cream will stay fresh in an airtight container in the freezer for up to two weeks before ice crystals begin to change its texture.
Nutrition Information Table
The values below show the estimated nutrition facts for this recipe per single serving scoop.
| Nutrient | Per Serving |
| Calories | 270 kcal |
| Protein | 3 g |
| Total Fat | 20 g |
| Carbohydrates | 21 g |
| Dietary Fiber | 0 g |
| Sugars | 20 g |
| Sodium | 45 mg |
Important Disclaimer
Please enjoy this homemade ice cream as an occasional sweet treat within a balanced diet. Because this recipe contains high amounts of dairy and sugar, eating large portions at once may not suit individuals monitoring their caloric intake or managing certain health conditions. Additionally, this recipe contains dairy products like milk and heavy cream, which are common food allergens. If you or your guests have known allergies to dairy, please avoid eating this dish or prepare it using safe plant-based alternatives.