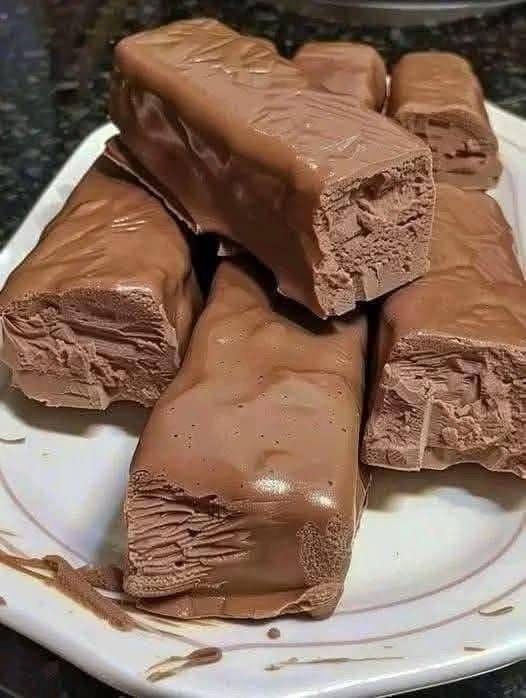
Homemade Chocolate Bars
Homemade Chocolate Bars are rich, smooth, and full of delicious chocolate flavor. They are easy to make with just a few simple ingredients and can be customized with your favorite mix ins. Whether you enjoy dark chocolate, milk chocolate, or white chocolate, making your own chocolate bars at home is a fun and rewarding experience. Every bite is creamy, sweet, and perfect for sharing with family and friends.
One of the best things about Homemade Chocolate Bars is how simple the recipe is. You do not need special equipment or advanced baking skills. By melting chocolate carefully and pouring it into molds, you can create beautiful chocolate bars that look and taste amazing. You can also add nuts, dried fruit, cookies, or crispy rice to make each bar unique.
These Homemade Chocolate Bars are perfect for holidays, birthdays, gifts, parties, or everyday treats. They can be wrapped in decorative paper for homemade gifts or enjoyed as a sweet dessert after dinner. Once you learn how easy they are to make, you may never want to buy chocolate bars from the store again.
Cooking Time and Serving
| Details | Time |
|---|---|
| Preparation Time | 15 minutes |
| Chilling Time | 2 hours |
| Total Time | 2 hours 15 minutes |
| Servings | 8 chocolate bars |
Ingredients
- 4 cups milk chocolate chips or chopped milk chocolate
- 2 tablespoons coconut oil or cocoa butter
- 1 teaspoon vanilla extract
- 1 small pinch of salt
Optional Mix Ins
- 1 half cup chopped almonds
- 1 half cup chopped hazelnuts
- 1 half cup chopped pistachios
- 1 half cup dried cranberries
- 1 half cup raisins
- 1 half cup crispy rice cereal
- 1 half cup mini marshmallows
- Colorful candy sprinkles for decoration
How to Make Homemade Chocolate Bars
Step 1
Prepare clean chocolate bar molds or a parchment lined baking pan.
Step 2
Place the chocolate into a heat safe bowl.
Step 3
Add the coconut oil or cocoa butter.
Step 4
Melt the chocolate gently using a bowl placed over warm water or by heating in short microwave intervals.
Step 5
Stir until the chocolate becomes smooth and shiny.
Step 6
Mix in the vanilla extract and salt.
Step 7
Add any optional mix ins if desired.
Step 8
Pour the melted chocolate into the prepared molds.
Step 9
Tap the molds gently on the counter to remove air bubbles.
Step 10
Sprinkle extra nuts or decorations on top if desired.
Step 11
Place the molds in the refrigerator.
Step 12
Chill for about two hours until completely firm.
Step 13
Carefully remove the chocolate bars from the molds.
Step 14
Store in an airtight container until ready to enjoy.
Recipe Notes
Use good quality chocolate for the best flavor.
Melt the chocolate slowly to prevent burning.
Keep all bowls and utensils completely dry.
Allow the chocolate to chill fully before removing it from the molds.
Store the finished bars in a cool place.
Handle carefully because homemade chocolate softens more quickly in warm temperatures.
Tips for the Best Homemade Chocolate Bars
Choose high quality chocolate.
Stir the chocolate gently while melting.
Avoid getting water into the melted chocolate.
Use silicone molds for easy removal.
Add toppings before the chocolate hardens.
Keep the finished bars cool.
Serving Ideas
Serve with coffee.
Enjoy with hot chocolate.
Pair with fresh strawberries.
Add to dessert boards.
Serve with vanilla ice cream.
Break into pieces for gift boxes.
Enjoy as an afternoon treat.
Use as a homemade holiday gift.
Storage
Store the chocolate bars in an airtight container.
Keep them in a cool dry place.
Refrigerate during warm weather.
They stay fresh for about three weeks.
Freeze for up to three months if needed.
Frequently Asked Questions
Can I use dark chocolate
Yes. Dark chocolate works very well and gives a richer flavor.
Can I use white chocolate
Yes. White chocolate can be used with the same method.
Why did my chocolate become thick
Even a small amount of water may cause melted chocolate to become thick.
Can I add nuts
Yes. Almonds, hazelnuts, walnuts, and pistachios are all excellent choices.
Can I make these chocolate bars ahead of time
Yes. They store well and are perfect for preparing in advance.
Can children help make this recipe
Yes. Children can help pour the chocolate into molds with adult supervision.
How do I make shiny chocolate bars
Carefully melting and cooling the chocolate helps create a smooth finish.
Can I use chocolate molds of different shapes
Yes. Any clean food safe chocolate mold will work.
Nutrition Information
Nutrition Per Recipe
| Nutrient | Amount |
|---|---|
| Calories | 4240 |
| Protein | 48 grams |
| Carbohydrates | 360 grams |
| Sugar | 308 grams |
| Fat | 292 grams |
| Saturated Fat | 174 grams |
| Fiber | 20 grams |
| Sodium | 620 milligrams |
| Calcium | 560 milligrams |
Nutrition Per Serving
| Nutrient | Amount |
|---|---|
| Calories | 530 |
| Protein | 6 grams |
| Carbohydrates | 45 grams |
| Sugar | 38.5 grams |
| Fat | 36.5 grams |
| Saturated Fat | 21.8 grams |
| Fiber | 2.5 grams |
| Sodium | 78 milligrams |
| Calcium | 70 milligrams |
Why You Will Love This Recipe
Homemade Chocolate Bars are simple, delicious, and fun to make. You can choose your favorite chocolate and customize every bar with different mix ins and toppings. The result is a rich and creamy treat that tastes fresh and homemade.
Another reason to love this recipe is its versatility. You can make chocolate bars for birthdays, holidays, gifts, or family celebrations. They also make wonderful homemade presents because they can be wrapped beautifully and shared with loved ones.
Making chocolate bars at home also allows you to control the ingredients. You can select premium chocolate, reduce added ingredients, and create unique flavors that match your personal taste.
Expert Tips
Use a clean and dry bowl when melting chocolate.
Melt the chocolate slowly to keep it smooth.
Tap the molds gently to remove air bubbles.
Allow the bars to chill completely before removing them.
Store away from heat and direct sunlight.
Wrap individually for homemade gifts.
Conclusion
Homemade Chocolate Bars are a fun and rewarding recipe that anyone can make. With only a few ingredients and simple steps, you can create rich, creamy chocolate bars that look beautiful and taste amazing.
Whether you enjoy them as a dessert, a snack, or a homemade gift, these chocolate bars are sure to impress. They are easy to customize, simple to prepare, and perfect for sharing with family and friends.
Once you make your own Homemade Chocolate Bars, you may find yourself creating new flavors and enjoying fresh homemade chocolate whenever you want a sweet treat.
Disclaimer
Enjoy Homemade Chocolate Bars as part of a balanced diet and eat sweet treats in moderation. This recipe may contain dairy, soy, nuts, or other common allergens depending on the chocolate and mix ins you choose. Always read ingredient labels carefully if you have food allergies, food sensitivities, or special dietary needs. Nutrition values are estimates and may vary depending on the ingredients and brands you use.