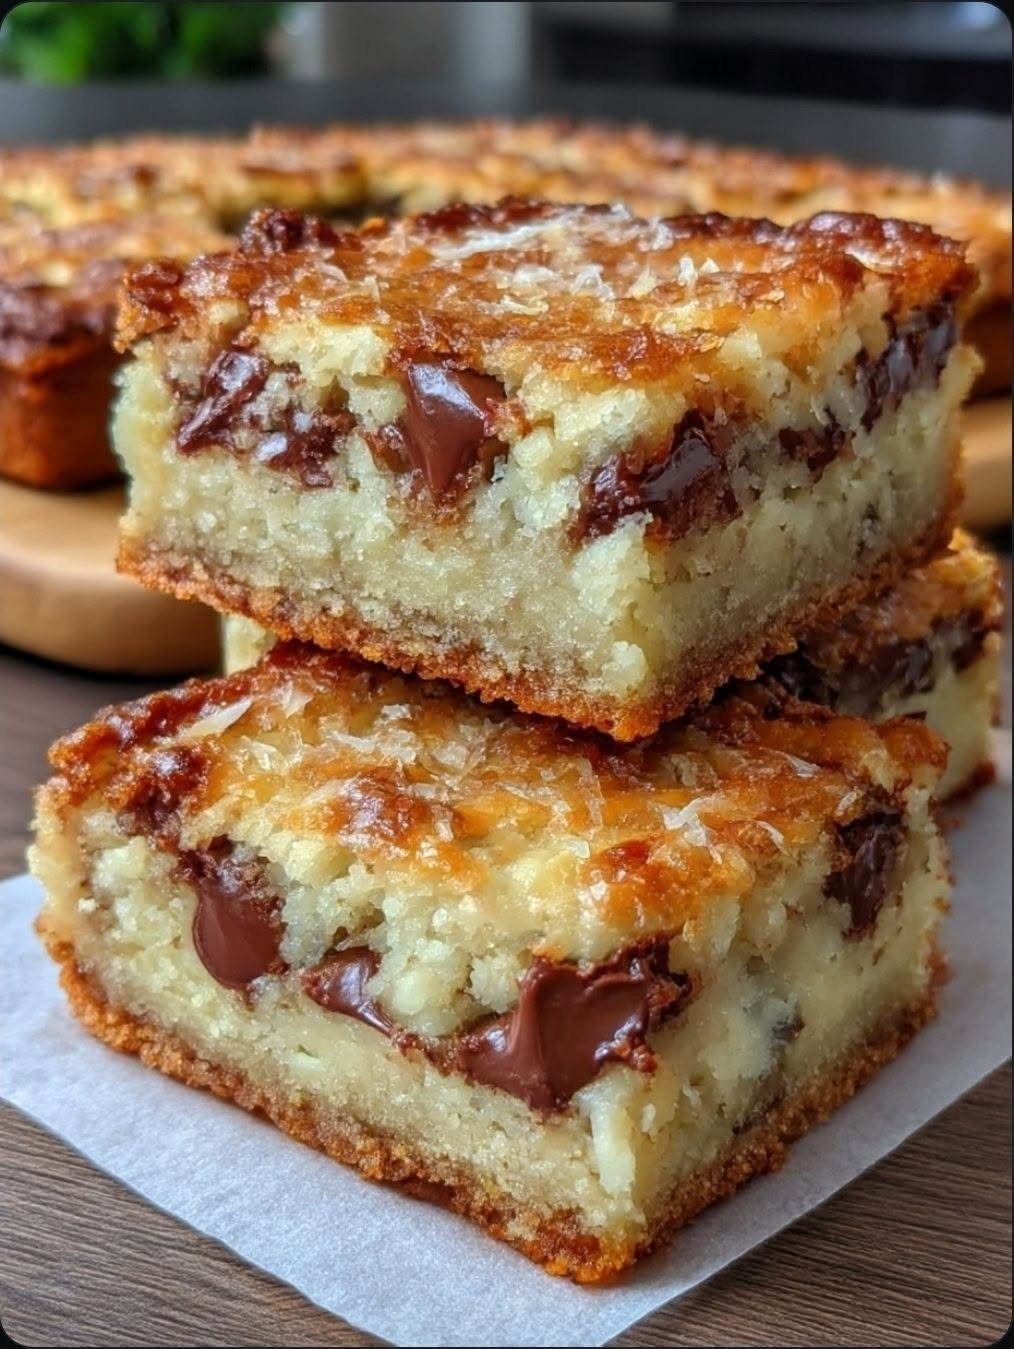
Congo Bars Recipe: The Ultimate Chewy, Buttery Blondie You’ll Bake Again and Again
Golden, gooey, and packed with rich brown sugar flavor and melty chocolate chips, these homemade Congo Bars are the kind of dessert that disappears almost as soon as they come out of the oven. With crisp edges, a soft, chewy center, and a hint of vanilla in every bite, this classic cookie bar recipe is easy enough for weeknights yet impressive enough for holidays, bake sales, and family gatherings.
Introduction: A Sweet Memory Baked into Every Bite
There’s something special about recipes that instantly transport you back to childhood. For me, Congo Bars are one of those unforgettable treats. The moment the warm aroma of butter, brown sugar, and vanilla fills the kitchen, I can’t help but think of cozy weekends spent waiting impatiently by the oven.
Unlike traditional cookies, Congo Bars don’t require scooping individual dough balls or baking multiple batches. Instead, everything comes together in one pan, creating thick, bakery-style dessert bars with irresistibly chewy centers and beautifully golden edges.
The first bite is pure comfort. The buttery blondie base melts in your mouth while pockets of gooey chocolate chips add bursts of sweetness. Every square delivers a delightful contrast of textures—slightly crisp around the edges, soft in the middle, and rich with caramel-like notes from brown sugar.
Whether you’re baking for a birthday party, holiday dessert table, potluck, or simply satisfying a sweet craving on a rainy afternoon, these Congo Bars never disappoint. Best of all, they’re incredibly simple to make using pantry staples, making them a reliable dessert you’ll come back to time and time again.
Why You’ll Love This Recipe
These Congo Bars are everything you want in an easy homemade dessert.
- ✔ Soft, chewy, bakery-style texture
- ✔ Rich buttery brown sugar flavor
- ✔ Loaded with chocolate chips
- ✔ No mixer required (optional)
- ✔ One-bowl recipe for easy cleanup
- ✔ Ready in under one hour
- ✔ Perfect for bake sales and parties
- ✔ Beginner-friendly
- ✔ Budget-friendly pantry ingredients
- ✔ Easy to customize with nuts or candies
- ✔ Great for meal prep and freezing
- ✔ Kid-approved favorite
- ✔ Perfect for lunchboxes and picnics
Ingredients (With Exact Measurements)
Yield: 24 bars
Main Ingredients
- 340 g unsalted butter, melted (1½ cups / 12 oz)
- 450 g light brown sugar, packed (2¼ cups / 16 oz)
- 100 g granulated sugar (½ cup / 3.5 oz)
- 4 large eggs (about 200 g / 7 oz)
- 2 tsp vanilla extract (10 ml)
- 390 g all-purpose flour (3¼ cups / 13.8 oz)
- 2 tsp baking powder (8 g)
- 1 tsp salt (6 g)
- 340 g semi-sweet chocolate chips (2 cups / 12 oz)
Optional Mix-Ins
- 120 g chopped walnuts (1 cup / 4 oz)
- 120 g pecans (1 cup / 4 oz)
- 100 g white chocolate chips (½ cup / 3.5 oz)
- 80 g toffee bits (½ cup / 2.8 oz)
Healthy Ingredient Substitutes
If you’d like to make a few lighter swaps:
- Replace half the butter with unsweetened applesauce for a softer texture.
- Use whole wheat pastry flour for up to half of the all-purpose flour.
- Substitute dark chocolate chips for semi-sweet to reduce added sugar.
- Reduce the chocolate chips slightly if you prefer a less sweet dessert.
Keep in mind that substitutions may slightly alter the texture and richness.
Nutritional Information (Per Serving)
Approximate values based on 24 bars.
| Nutrient | Amount |
|---|---|
| Calories | 310 kcal |
| Protein | 3 g |
| Carbohydrates | 38 g |
| Fat | 17 g |
| Saturated Fat | 10 g |
| Fiber | 1.5 g |
| Sugar | 27 g |
| Sodium | 120 mg |
| Calcium | 3% DV |
| Iron | 6% DV |
Dietary Information
- Vegetarian
- Nut-free (if nuts are omitted)
- Not gluten-free
- Not vegan
- Not keto
- Soy-free (depending on chocolate chips used)
Kitchen Tools Needed
Gather these basic kitchen essentials before you begin:
- 9×13-inch (23×33 cm) baking pan
- Parchment paper
- Large mixing bowl
- Medium mixing bowl
- Whisk
- Silicone spatula
- Measuring cups and spoons
- Kitchen scale (recommended for accuracy)
- Cooling rack
- Sharp knife for slicing
Step-by-Step Preparation
Step 1: Prepare the Oven and Pan
Preheat your oven to 350°F (175°C).
Line a 9×13-inch baking pan with parchment paper, leaving a slight overhang on the sides for easy removal. Lightly grease the paper with butter or nonstick spray.
Pro Tip: Parchment paper helps prevent sticking and makes cutting cleaner bars much easier.
Step 2: Mix the Wet Ingredients
In a large mixing bowl, whisk together the melted butter, brown sugar, and granulated sugar until smooth and glossy, about 2 minutes.
Add the eggs one at a time, whisking well after each addition. Stir in the vanilla extract until fully combined.
The mixture should look silky and slightly thick.
Step 3: Combine the Dry Ingredients
In a separate bowl, whisk together the flour, baking powder, and salt.
This ensures the leavening agent is evenly distributed for consistent baking.
Step 4: Make the Batter
Gradually fold the dry ingredients into the wet ingredients using a spatula.
Mix just until no streaks of flour remain. Avoid overmixing, as this can make the bars dense instead of chewy.
Fold in the chocolate chips and any optional mix-ins.
Step 5: Spread into the Pan
Transfer the batter to the prepared baking pan and spread it evenly with a spatula.
The batter will be thick—take your time smoothing the surface.
For a bakery-style finish, sprinkle a handful of extra chocolate chips over the top.
Step 6: Bake
Bake for 28–35 minutes, or until:
- The edges are golden brown.
- The center is set but still slightly soft.
- A toothpick inserted near the center comes out with a few moist crumbs (not wet batter).
Avoid overbaking to preserve the chewy texture.
Step 7: Cool Completely
Place the pan on a wire rack and let the bars cool for at least 45 minutes before slicing.
For the cleanest cuts, chill the bars for 20–30 minutes after they’ve cooled to room temperature.
Expert Cooking Tips & Mistakes to Avoid
Use Room-Temperature Eggs
Cold eggs can cause the melted butter to seize, resulting in a less smooth batter.
Measure Flour Correctly
Too much flour leads to dry, cakey bars. Spoon the flour into your measuring cup and level it off, or use a kitchen scale for the most accurate results.
Don’t Overmix
Once the flour is added, stir only until combined. Overmixing develops gluten and makes the bars tougher.
Underbake Slightly
Congo Bars continue to cook from residual heat after they’re removed from the oven. Pull them out when the center is just set for perfectly chewy bars.
Cool Before Cutting
Cutting while the bars are still warm can cause them to crumble. Let them cool completely for neat, even squares.
Variations & Customizations
Spicy Version
Add a subtle kick by mixing in:
- ½ teaspoon ground cinnamon
- A pinch of cayenne pepper
- A dash of espresso powder for deeper chocolate flavor
The warmth complements the caramel-like sweetness beautifully.
Healthier Version
For a lighter take:
- Replace half the butter with unsweetened applesauce.
- Use dark chocolate chips with a higher cocoa percentage.
- Reduce the sugar by ¼ cup (50 g) for a less sweet bar.
The texture will be slightly softer but still delicious.
Kids-Friendly Version
Make these bars extra fun by:
- Using colorful chocolate candies instead of some of the chocolate chips.
- Mixing in mini marshmallows.
- Cutting the cooled bars into bite-sized squares for lunchboxes or parties.
Storage & Reheating Instructions
Refrigerator
Store Congo Bars in an airtight container.
Shelf Life: Up to 1 week.
Separate layers with parchment paper to prevent sticking.
Freezer
Wrap individual bars tightly in plastic wrap, then place them in a freezer-safe bag or container.
Shelf Life: Up to 3 months.
Thaw at room temperature before serving.
Best Reheating Method
For that fresh-from-the-oven taste:
- Microwave: Heat a bar for 10–15 seconds until warm and the chocolate softens.
- Oven: Warm at 300°F (150°C) for 5–7 minutes if reheating several bars.
Serving Suggestions
Congo Bars are wonderfully versatile and pair well with a variety of drinks and desserts.
Try serving them with:
- A glass of cold milk
- Freshly brewed coffee
- Hot chocolate
- Vanilla ice cream
- Salted caramel ice cream
- Whipped cream and fresh berries
- Chocolate sauce drizzle
- Caramel sauce
- Chopped toasted pecans
- Fresh strawberries or raspberries
They’re perfect for bake sales, birthday parties, holiday dessert trays, picnics, potlucks, and after-school snacks.
Frequently Asked Questions
1. What are Congo Bars?
Congo Bars are thick, chewy cookie bars similar to blondies. They’re made with brown sugar, butter, flour, eggs, and generous amounts of chocolate chips, creating a rich, caramel-like flavor.
2. Why are my Congo Bars dry?
Overbaking or adding too much flour are the most common causes. Measure carefully and remove the bars when the center is just set.
3. Can I use dark brown sugar?
Yes. Dark brown sugar gives the bars a deeper molasses flavor and a slightly darker color while maintaining their chewy texture.
4. Can I make Congo Bars ahead of time?
Absolutely! They’re an excellent make-ahead dessert and often taste even better the next day as the flavors continue to develop.
5. Can I freeze them?
Yes. Once cooled completely, wrap individual bars well and freeze for up to three months. Thaw at room temperature before serving.
6. Can I make them without chocolate chips?
Certainly. You can omit the chocolate chips or replace them with chopped nuts, dried fruit, or toffee bits for a different flavor profile.
7. Why are they called Congo Bars?
Despite the name, the dessert does not have a well-documented connection to the country of Congo. The origin of the name is uncertain, but the bars have been a popular American baked treat for decades.
Final Thoughts
Congo Bars are proof that some of the best desserts come from the simplest ingredients. Their buttery blondie base, rich brown sugar flavor, and generous pockets of melted chocolate make them an irresistible treat for any occasion. Easy to prepare, endlessly customizable, and perfect for sharing, they’re a recipe every home baker should have in their collection.
Whether you’re baking for family, friends, or simply treating yourself, these chewy dessert bars are sure to become a favorite that everyone requests again and again.
Try This Easy Congo Bars Recipe Today!
If you bake these Congo Bars, I’d love to hear how they turned out! Leave a comment below with your favorite mix-ins, rate the recipe, and share your baking tips with fellow readers. If you enjoyed this recipe, don’t forget to share it with friends and family on social media and save it for your next baking day. Happy baking!