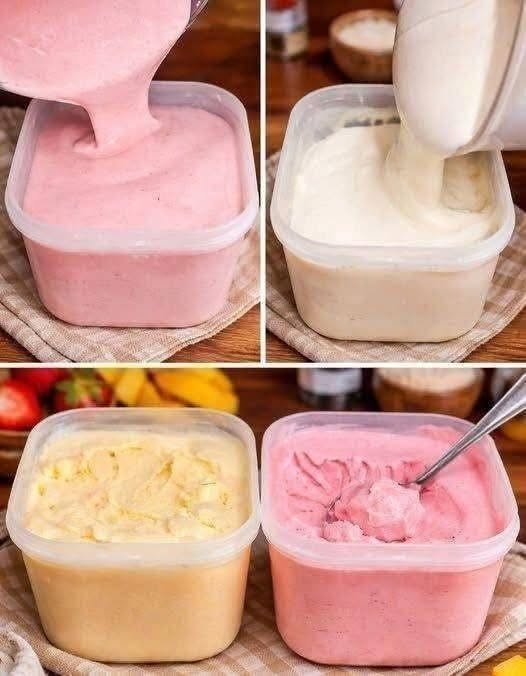
The Ultimate Guide to Easy No Churn Homemade Ice Cream
Nothing beats the sheer joy of eating a cold scoop of rich ice cream on a warm sunny afternoon. Many people believe that making this classic frozen treat at home requires a lot of difficult work. They think you absolutely need an expensive electric appliance that clutters your kitchen counters or hours of constant manual mixing to achieve a smooth texture. The amazing truth is that you can create the most delicious and creamy dessert using just three simple items that you can find at any local grocery store. This comprehensive guide will show you exactly how to make your own sweet treat with very little effort and maximum fun.
This specific kitchen recipe relies on a brilliant culinary technique that prevents large ice crystals from forming during the freezing process. Traditional old school recipes require constant stirring inside a freezing cold bucket to keep the cream silky and soft. By combining heavy whipping cream and sweet condensed milk, we can completely skip that exhausting requirement. The whipped cream provides millions of tiny trapped air bubbles that create a beautiful velvet texture, while the thick condensed milk keeps the base from turning into a solid block of ice. You get a premium quality result that melts beautifully on your tongue without needing any complex cooking knowledge or special machinery.
Once you master this incredibly basic base recipe, your creative options become absolutely endless. You can throw in crushed chocolate cookies, sweet strawberry ribbons, warm caramel pools, or crunchy roasted nuts to build your favorite custom flavor combination. Making frozen desserts right in your own home kitchen lets you control every single ingredient so you know exactly what your family is eating. It is a fantastic weekend activity that brings immediate smiles to both adults and children alike while keeping your food free from artificial colors and strange chemical preservatives.
Preparation Time and Serving Details
To help you organize your afternoon cooking schedule and prepare your kitchen space, here is a quick overview of the time requirements and total yield for this simple dessert project.
-
Preparation time: Twenty minutes
-
Freezing time required: Six hours
-
Total wait time: Six hours and twenty minutes
-
Total servings: Eight people
-
Total yield: About one large quart of smooth ice cream
Simple Ingredients for Your Homemade Ice Cream
You do not need any rare or costly specialty items to create a wonderful batch of this frozen dessert. These everyday baking ingredients are cheap and can be found in almost any neighborhood pantry or corner food shop.
-
Two cups of heavy whipping cream: Make sure to choose a cream with high fat content, usually labeled thirty six percent fat or higher, for maximum fluffiness.
-
One can of sweetened condensed milk: This fourteen ounce can provides all the necessary sweetness and keeps the final frozen texture ultra smooth. Do not confuse this with evaporated milk.
-
Two teaspoons of pure vanilla extract: This gives your base a deep, warm, and highly aromatic vanilla aroma.
-
One tiny pinch of fine salt: A small shake of salt balances the intense sugar level and boosts the overall flavor profile of the dairy.
How to Make Homemade Ice Cream Step by Step
Follow these clear and direct instructions to achieve a beautiful frozen dessert that mimics high quality ice cream parlor treats.
Important Kitchen Notes for Absolute Success
Dairy Temperature Matters Most
Always keep your heavy whipping cream in the very deepest and coldest part of your refrigerator until the exact moment you pour it into your mixing bowl. Warm cream will refuse to trap air properly when whipped, and it might turn into liquid butter instead of a light fluffy foam.
Choosing the Best Storage Container
A metal pan conducts cold temperatures beautifully and helps the dessert freeze much faster than plastic containers do. If you choose to use an open metal loaf pan, wrapping it tightly with two full layers of plastic wrap helps keep out the cold stale freezer air. This simple protection preserves the fresh taste of the vanilla for a longer period of time.
How to Mix In Fun Flavor Additions
If you want to add chocolate chips, candy bits, or crushed cookies, always fold them in gently during the very last step of mixing. Do not overmix after adding your treats because you want the bits distributed evenly throughout the creamy cloud instead of sinking directly to the bottom of the pan.
Softening Your Scoop Before Serving
Because this simple recipe does not use an electric churn machine to pump extra air inside, it can freeze quite solid after twenty four hours. Leave your container sitting on your kitchen counter for about five minutes before you try to scoop it out. Dipping your metal ice cream scoop into a cup of warm water also makes rolling perfect pretty spheres incredibly easy.
Preventing Freezer Odors
Ice cream can easily absorb the flavors of other foods in your freezer like onions or garlic. Always ensure your storage container is sealed completely airtight. If you are using a loaf pan, placing the entire wrapped pan inside a large zip top freezer bag provides an extra layer of protection.
Creative Flavor Variations
To create a rich chocolate version, sift one half cup of unsweetened cocoa powder into the condensed milk before folding in the cream. For a fruity twist, swirl in a thick raspberry or blueberry compote that has been completely cooled down to room temperature.
Frequently Asked Questions
Can I use regular liquid milk instead of condensed milk?
No, regular liquid milk contains far too much water. If you try to use regular milk without a special machine, your mixture will freeze into a solid block of hard ice rather than a smooth cream. Sweetened condensed milk is absolutely necessary because most of the natural water content has been cooked away during factory processing.
How long does this homemade dessert stay fresh in the freezer?
This homemade treat will stay perfectly fresh and flavorful for up to two full weeks if it is covered correctly with plastic wrap. After two weeks, the cream might begin to absorb random odors from your freezer or develop small crunchy ice crystals on the outer surface which alters the texture.
Can I make this dessert recipe completely sugar free?
This specific recipe relies heavily on the real sugar inside the condensed milk to keep the final texture soft and scoopable. Replacing it with artificial sweeteners will change the chemical structure of the mixture and cause the dessert to become rock hard like ice when placed in the freezer.
Is an electric mixer absolutely necessary for this recipe?
An electric hand mixer makes the process much faster, but you can definitely use a traditional metal hand whisk instead. Be prepared for a great arm workout because whipping heavy cream by hand takes about fifteen minutes of constant, rapid circular motion to get the right stiffness.
Why does my finished product taste way too sweet?
Sweetened condensed milk is naturally very high in sugar content. If the base tastes too sweet for your personal preference, you can increase the amount of heavy whipping cream to two and a half cups or add an extra pinch of salt to balance out the deep flavor profile.
Can I add fresh fruit pieces to this base?
Yes, fresh fruit makes a wonderful seasonal addition. It is best to cook the chopped fruit down into a thick sauce with a little sugar first and let it cool completely. Swirl the cooled fruit sauce into the mixture right before freezing to prevent big chunks of hard frozen water from ruining your experience.
What causes ice crystals to form on top of the cream?
Ice crystals form when air or moisture comes into direct contact with the surface of the freezing cream. To stop this from happening, press a piece of plastic wrap directly onto the wet surface of the liquid before you put the lid on the container. This blocks the air completely.
Can I use half and half instead of heavy whipping cream?
No, half and half does not contain enough fat to hold its shape when whipped. You must use heavy cream or heavy whipping cream because the fat particles are what trap the air bubbles, giving the dessert its signature fluffy body.
Detailed Nutrition Information
The following tables provide the estimated nutritional values for this simple homemade dessert recipe. These values can change slightly depending on the specific brands of dairy products you purchase at your local shop.
Recipe Totals and Per Serving Breakdown
| Nutritional Component | Amount Per Single Serving | Total Amount For Full Recipe |
| Total Calories | Three hundred and forty calories | Two thousand seven hundred and twenty calories |
| Total Fat Content | Twenty two grams | One hundred and seventy six grams |
| Saturated Fat | Fourteen grams | One hundred and twelve grams |
| Cholesterol Level | Eighty milligrams | Six hundred and forty milligrams |
| Sodium Content | Seventy milligrams | Five hundred and sixty milligrams |
| Total Carbohydrates | Thirty one grams | Two hundred and forty eight grams |
| Dietary Sugars | Thirty one grams | Two hundred and forty eight grams |
| Protein Content | Six grams | Forty eight grams |
Vitamin and Mineral Content
| Nutrient Type | Relative Percentage Value Per Serving |
| Vitamin A | Ten percent of your daily needs |
| Calcium | Fifteen percent of your daily needs |
| Iron | Zero percent of your daily needs |
| Vitamin C | Two percent of your daily needs |
Important Food Safety and Health Disclaimer
This rich and creamy dessert should always be enjoyed in moderation as part of a balanced lifestyle. This specific recipe contains high amounts of dairy sugar and saturated fats which may not be suitable for individuals who are actively tracking certain health goals or managing blood sugar conditions.
This dish contains major food allergens including milk and dairy products. If you are preparing this sweet treat for guests or a school party, always verify that your friends do not suffer from severe lactose intolerance or dangerous milk allergies. Always practice proper hygiene in your kitchen by washing your hands thoroughly with soap and warm water and sanitizing all mixing tools before you begin handling your fresh ingredients.