Pavlova Recipe: A Light, Crisp, and Creamy Dessert That Feels Like a Celebration
Introduction: A Dessert That Melts Hearts Before It Melts in Your Mouth
Imagine slicing into a dessert that makes the room go quiet for a moment. The knife gently cracks through a delicate, golden-edged shell, revealing a cloud-like centre that feels almost too beautiful to eat. A spoonful brings together crisp meringue, silky whipped cream, and bursts of juicy fruit — a combination of sweetness, freshness, and pure comfort.
That’s the magic of pavlova.
I still remember the first time I made pavlova for a special gathering. I was nervous because the dessert looked so elegant that it seemed impossible to recreate at home. But when that glossy meringue came out of the oven with its crisp exterior and soft marshmallow-like centre, I realised something: pavlova isn’t about perfection. It’s about creating a moment people remember.
The aroma is delicate and inviting — sweet vanilla, caramelised sugar, and fresh fruit filling the kitchen. The texture is what makes pavlova unforgettable: a crisp shell that gently shatters, followed by a soft, airy centre topped with smooth cream and colourful fruit.
Whether you’re making it for a birthday, holiday, dinner party, or simply a weekend treat, this pavlova recipe turns simple ingredients into a dessert that feels luxurious.
Why You’ll Love This Pavlova Recipe
There are so many reasons pavlova has become a favourite dessert around the world:
- Easy to make at home: Although it looks impressive, pavlova requires only a handful of simple ingredients.
- Budget-friendly: Egg whites, sugar, and seasonal fruit create a stunning dessert without expensive ingredients.
- Naturally gluten-free: No flour is needed, making it suitable for many gluten-free diets.
- Light and refreshing: Compared with heavier cakes and pastries, pavlova feels airy and fresh.
- Perfect for entertaining: It makes a beautiful centrepiece for celebrations.
- Customisable: Change the toppings with different fruits, creams, and flavours.
- Kid-friendly: Children love the crunchy shell, creamy topping, and colourful fruit.
- Naturally lower in fat: The meringue itself contains no butter or oil.
Ingredients for Classic Pavlova
For the Meringue Base
- Egg whites: 150 g (about 5 large egg whites / 5.3 oz)
- Caster sugar: 300 g (1½ cups / 10.6 oz)
- Cornflour (cornstarch): 10 g (1 tablespoon / 0.35 oz)
- White vinegar or lemon juice: 10 ml (2 teaspoons / 0.7 fl oz)
- Vanilla extract: 5 ml (1 teaspoon / 0.17 fl oz)
- Fine salt: 1 g (¼ teaspoon)
For the Cream Topping
- Double cream (heavy cream): 300 ml (1¼ cups / 10.1 fl oz)
- Icing sugar (powdered sugar): 30 g (¼ cup / 1 oz)
- Vanilla extract: 5 ml (1 teaspoon / 0.17 fl oz)
Fruit Topping
Choose fresh seasonal fruit:
- Strawberries: 200 g (1½ cups sliced / 7 oz)
- Blueberries: 100 g (¾ cup / 3.5 oz)
- Kiwi fruit: 2 medium fruits, about 150 g (5.3 oz)
- Passion fruit pulp: 80 g (⅓ cup / 2.8 oz)
Healthy Ingredient Substitutes
You can adjust the recipe depending on your preferences:
- Replace refined sugar with fine coconut sugar for a slightly deeper flavour (note that it may darken the colour).
- Use Greek yoghurt mixed with whipped cream for a lighter topping.
- Choose berries instead of high-sugar fruits for a lower-sugar option.
- Use maple-flavoured fruit compote instead of extra sugar toppings.
- For dairy-free pavlova, use coconut whipped cream.
Nutritional Information (Per Serving)
Approximate values based on 8 servings:
- Calories: 290 kcal
- Protein: 4 g
- Carbohydrates: 45 g
- Fats: 10 g
- Fiber: 2 g
Vitamins and Minerals
Depending on the fruit used, pavlova can provide:
- Vitamin C from strawberries and kiwi
- Antioxidants from berries
- Potassium from fruit toppings
- Calcium from dairy cream
Dietary Information
- Gluten-free: Yes
- Vegetarian: Yes
- Vegan: No (contains egg whites and dairy)
- Keto-friendly: No (high in sugar)
- Dairy-free option: Yes, using coconut cream
- Egg-free option: Difficult, as traditional pavlova relies on whipped egg whites
Kitchen Tools Needed
To make a successful pavlova, gather:
- Large clean mixing bowl
- Electric hand mixer or stand mixer
- Rubber spatula
- Baking tray
- Baking paper/parchment paper
- Measuring cups and spoons
- Kitchen scale
- Whisk attachment
- Serving platter
- Piping bag (optional for decorative shapes)
Step-by-Step Pavlova Preparation
Step 1: Prepare Your Oven and Baking Tray
Preheat your oven to:
150°C (300°F)
Line a baking tray with parchment paper.
Draw a circle around 20 cm (8 inches) in diameter if you want a neat shape.
Pro tip: Make sure your mixing bowl and beaters are completely clean and dry. Any trace of grease can prevent egg whites from whipping properly.
Step 2: Whip the Egg Whites
Place egg whites into your mixing bowl.
Begin whisking on medium speed until they become foamy.
Add the salt and continue mixing until soft peaks form.
You’ll know they’re ready when the mixture looks white, thick, and fluffy.
Step 3: Slowly Add the Sugar
Gradually add the caster sugar, one tablespoon at a time.
This step takes patience — rushing can create a grainy meringue.
Continue beating for around 8–10 minutes until the mixture is:
- Thick
- Glossy
- Smooth
- Able to hold stiff peaks
Rub a little meringue between your fingers. If it feels gritty, continue mixing until the sugar dissolves.
Step 4: Add the Final Ingredients
Gently fold in:
- Cornflour
- Vinegar or lemon juice
- Vanilla extract
Use a spatula and fold slowly to keep the air inside the meringue.
These ingredients help create the famous pavlova texture: crisp outside and soft inside.
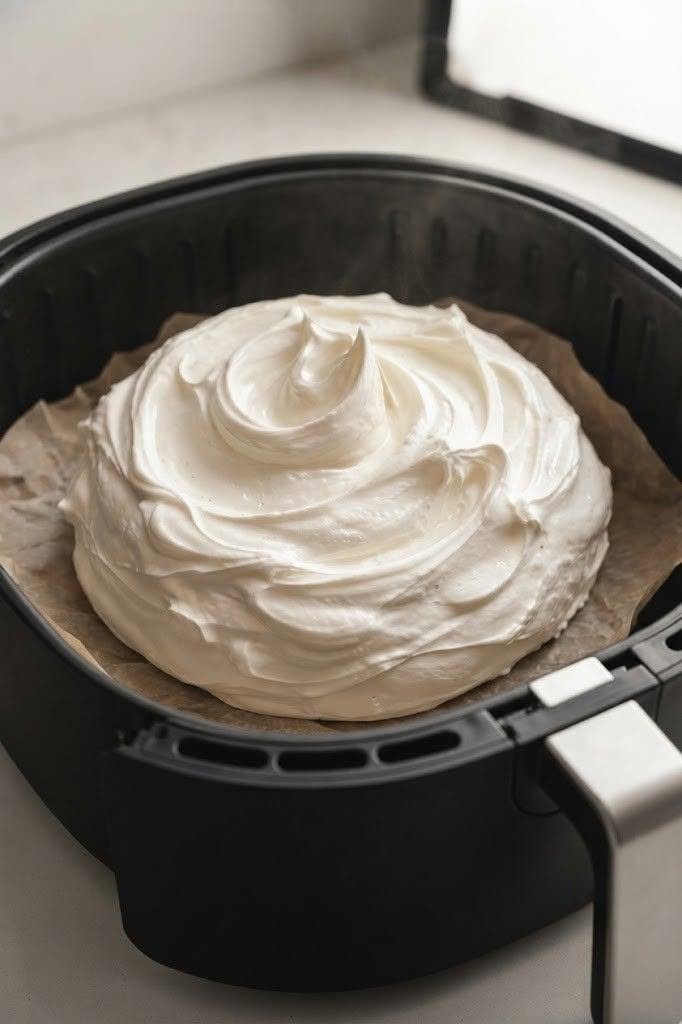
Step 5: Shape the Pavlova
Spoon the mixture onto your prepared tray.
Create a round shape with slightly raised edges and a shallow centre.
The centre should be ready to hold cream and fruit after baking.
Step 6: Bake Slowly
Place the pavlova in the oven.
Immediately reduce the temperature to:
120°C (250°F)
Bake for:
90 minutes
The pavlova should look:
- Pale cream in colour
- Dry on the outside
- Slightly soft in the centre
Turn off the oven and leave the pavlova inside for 1–2 hours with the door slightly open.
This prevents sudden temperature changes that can cause cracking.
Step 7: Add Cream and Fruit
Whip the cream with icing sugar and vanilla until soft peaks form.
Spread it over the cooled pavlova.
Top generously with fresh fruit.
Serve immediately for the best texture.
Expert Cooking Tips and Mistakes to Avoid
1. Avoid Any Egg Yolk Contamination
Even a tiny amount of yolk can stop egg whites from whipping.
Tip: Separate eggs one at a time in a small bowl before adding them together.
2. Don’t Add Sugar Too Quickly
Adding sugar all at once can create a weak meringue.
Slow and steady creates the perfect glossy texture.
3. Don’t Overmix After Adding Cornflour
Fold gently. Too much mixing removes air and makes pavlova dense.
4. Don’t Bake at High Heat
High temperatures cause browning and cracks.
Pavlova needs low, slow baking.
5. Cracks Are Normal
A few cracks are part of pavlova’s charm.
The cream and fruit will cover imperfections beautifully.
Pavlova Variations and Customisations
Spicy Pavlova Version
For a unique twist:
- Add a pinch of cinnamon to the meringue.
- Top with roasted pineapple and chilli-lime fruit salsa.
- Add a little ginger syrup for warmth.
Healthy Pavlova Version
Try:
- Reduced sugar meringue.
- Greek yoghurt topping instead of cream.
- Extra berries for antioxidants.
- Chia seed fruit topping.
Kids-Friendly Pavlova Version
Make it fun by adding:
- Colourful sprinkles
- Mini chocolate pieces
- Banana slices
- Berry shapes arranged like flowers
You can also make individual mini pavlovas for little hands.
Storage and Reheating Instructions
Refrigerator Storage
A decorated pavlova is best eaten immediately, but leftovers can be stored:
- Covered in the fridge for 1–2 days
Keep in mind that the meringue will soften as it absorbs moisture from the cream.
Freezer Storage
The plain baked meringue base can be frozen:
- Store in an airtight container for up to 1 month
Thaw at room temperature before decorating.
Best Reheating Method
Pavlova is not usually reheated.
If the meringue becomes slightly soft, place it in a low oven:
- 100°C (210°F) for 10–15 minutes
Allow it to cool before adding toppings.
Serving Suggestions
Pavlova is beautiful on its own, but these pairings make it even more special:
- Fresh berries and mint leaves
- Lemon curd drizzle
- Passion fruit sauce
- Dark chocolate shavings
- A cup of coffee or tea
- Sparkling fruit drinks for celebrations
For dinner parties, serve pavlova as a dramatic final course with everyone adding their own favourite toppings.
Frequently Asked Questions
1. Why is my pavlova sticky inside?
A slightly soft, marshmallow-like centre is normal. However, excessive stickiness usually means it needs more baking time or cooling time.
2. Why did my pavlova crack?
Cracks often happen because of sudden temperature changes. Cooling the pavlova slowly inside the oven helps prevent large cracks.
3. Can I make pavlova ahead of time?
Yes. Bake the meringue base a day ahead and store it at room temperature in an airtight container.
4. Can I use regular sugar instead of caster sugar?
Caster sugar dissolves more easily, but regular sugar can work if blended into a finer texture.
5. Can pavlova be made without vinegar?
Yes. Lemon juice works as a substitute because it provides acidity that helps stabilise the meringue.
6. How do I know when pavlova is done?
The outside should feel dry and crisp, while the inside should remain soft and slightly chewy.
7. Why is my meringue not forming stiff peaks?
Possible reasons include traces of fat, old egg whites, or sugar added too quickly.
Final Thoughts: Make a Pavlova Worth Remembering
Pavlova is more than just a dessert — it’s a celebration on a plate. It transforms simple pantry ingredients into something delicate, colourful, and unforgettable.
Whether you’re making it for loved ones, a special occasion, or simply because you deserve a beautiful homemade treat, this pavlova recipe is sure to impress.