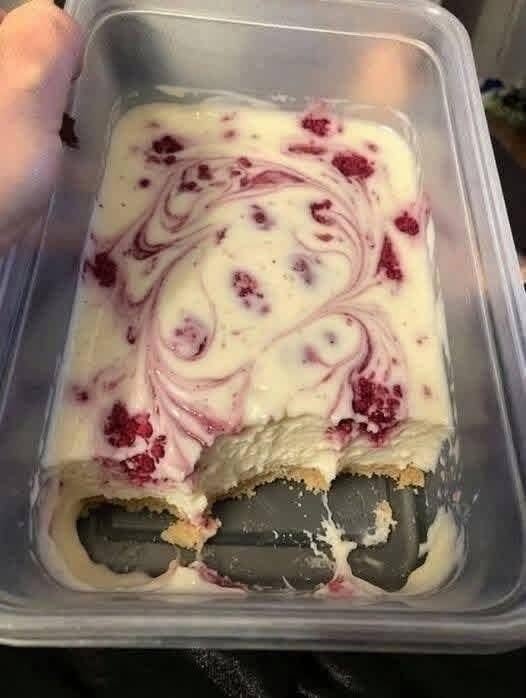
Zero-Carb Dessert: Light & Fluffy Vanilla Cloud
There are nights when you want dessert so badly that “just have some tea” simply isn’t going to cut it.
You want something sweet. Something soft. Something that feels like a real treat—not a sad substitute sitting at the bottom of a diet bowl.
That’s exactly where this Zero-Carb Vanilla Cloud Dessert comes in.
Imagine lifting a spoonful of an impossibly light, silky dessert to your lips. It’s cool and delicate, with a gentle vanilla aroma and a melt-in-your-mouth texture somewhere between airy mousse and a soft marshmallow. It tastes sweet without the heavy richness of traditional desserts, and best of all, the base contains zero carbohydrates when prepared with verified zero-carb ingredients.
It’s the kind of dessert you can make when the chocolate cake is calling your name, but you’re determined to stick with your low-carb or ketogenic goals.
And the best part?
You need only a handful of ingredients, a saucepan, and a little patience.
Why You’ll Love This Zero-Carb Dessert
There’s a lot to love about this simple little sweet treat:
- Zero-carb base: Made without flour, sugar, fruit, milk, or other traditional carbohydrate-heavy ingredients.
- Keto-friendly: An excellent option for people following a very low-carbohydrate ketogenic eating plan.
- Quick to prepare: The active preparation takes only about 10–15 minutes.
- Budget-friendly: A small amount of gelatin and sweetener goes a long way.
- Light and refreshing: Unlike rich cakes and brownies, this dessert won’t feel overwhelmingly heavy.
- Naturally gluten-free: No wheat, flour, or gluten-containing ingredients are required.
- Customizable: Change the flavor with a verified zero-carb flavoring.
- Make-ahead friendly: It needs time to chill, making it perfect for preparing earlier in the day.
- Portion-friendly: Individual servings make it easier to enjoy dessert mindfully.
- Kid-friendly: Its soft, fluffy texture can be especially appealing to children, although sweeteners should be chosen appropriately for your family.
Ingredients
Makes 4 servings
| Ingredient | Amount | Approx. ounces |
|---|---|---|
| Unflavored powdered gelatin | 12 g | 0.42 oz |
| Cold water | 60 ml | 2 fl oz / ¼ cup |
| Hot water | 240 ml | 8 fl oz / 1 cup |
| Zero-carb granulated sweetener | 30–40 g | 1.1–1.4 oz |
| Salt | 1 small pinch | — |
| Zero-carb vanilla flavoring | ½–1 tsp | 0.08–0.17 fl oz |
Sweetener note
The amount of sweetener depends on the product you use. Erythritol, stevia blends, monk-fruit blends, and other sugar substitutes vary dramatically in sweetness.
For the most accurate zero-carb result, choose a sweetener whose nutrition label shows 0 g carbohydrate per serving, and avoid products blended with maltodextrin, dextrose, sugar, honey, or other carbohydrate-containing fillers.
Flavor substitutions
Vanilla is delicious, but you can experiment with:
- Zero-carb chocolate flavoring
- Coffee flavoring
- Coconut flavoring
- Peppermint flavoring
- Almond flavoring
- Lemon flavoring
Always check the nutrition label if maintaining strict zero carbohydrate intake is important to you.
Nutritional Information
The following is an estimate for one of four servings, assuming ingredients labeled at zero carbohydrate are used.
Per serving
- Calories: approximately 40–50
- Protein: approximately 3 g
- Carbohydrates: 0 g*
- Fat: 0 g
- Fiber: 0 g
- Sugar: 0 g*
*The exact nutrition depends on the gelatin, sweetener, and flavoring brands used. For strict dietary tracking, calculate the recipe using the nutrition labels of your specific ingredients.
Dietary information
- Keto: Yes, when made with verified zero-carb ingredients
- Gluten-free: Yes
- Vegetarian: No, because gelatin is animal-derived
- Vegan: No
- Dairy-free: Yes
- Nut-free: Yes, provided the flavoring is nut-free
Kitchen Tools Needed
You don’t need a fancy kitchen to make this dessert.
Gather:
- Small saucepan
- Measuring cups
- Measuring spoons
- Small mixing bowl
- Whisk
- Electric hand mixer or stand mixer
- 4 small dessert glasses, ramekins, or serving bowls
- Refrigerator
A silicone spatula is also useful for scraping every last bit of the airy mixture into your serving dishes.
Step-by-Step Preparation
1. Bloom the gelatin
Pour 60 ml (¼ cup) cold water into a small bowl.
Sprinkle the 12 g (0.42 oz) gelatin evenly over the surface.
Don’t dump it into one giant pile.
Let the gelatin sit for approximately 5 minutes.
As it rests, the powder will absorb the water and swell. It should look thick and slightly rubbery.
Pro tip
Blooming the gelatin properly is one of the most important steps in this recipe. If you skip it, you may end up with stubborn little lumps that refuse to dissolve.
2. Heat the water
Pour 240 ml (1 cup) hot water into a small saucepan.
Warm it over low to medium heat until it is steaming hot, but don’t allow it to boil aggressively.
Add the sweetener and a tiny pinch of salt.
Whisk until the sweetener has dissolved.
Why add salt?
You won’t taste a salty dessert.
Instead, that tiny pinch helps round out the sweetness and gives the vanilla flavor more definition.
3. Add the gelatin
Add the bloomed gelatin to the hot water mixture.
Whisk continuously for about 1–2 minutes.
The gelatin should completely dissolve.
Hold the mixture up to the light or scoop a little onto a spoon. You shouldn’t see floating grains or cloudy gelatin pieces.
If you do, continue whisking gently over low heat.
Do not boil the gelatin mixture.
4. Add the vanilla
Remove the saucepan from the heat.
Stir in ½ to 1 teaspoon of zero-carb vanilla flavoring.
Start with less.
You can always add more, but you can’t take it back out.
Give the mixture a taste once it has cooled slightly.
It should taste pleasantly sweet and fragrant—not overwhelmingly sugary.
5. Cool the mixture
Pour the mixture into a clean mixing bowl.
Let it cool at room temperature for approximately 15–20 minutes.
You don’t want it piping hot when you begin whipping.
The mixture should still be liquid, but no longer steaming.
6. Chill until slightly thickened
Place the bowl in the refrigerator for approximately 30–45 minutes.
This is the stage where patience pays off.
You don’t want the mixture completely set.
Instead, you’re looking for a texture similar to a thin jelly or very soft pudding.
When you drag a whisk through it, you should see faint trails that slowly disappear.
Important
If you accidentally chill it until completely firm, don’t panic.
Let it sit at room temperature for a few minutes, then gently loosen it with a whisk.
7. Whip until fluffy
Now comes the transformation.
Using an electric hand mixer, beat the chilled mixture on medium-high speed for approximately 5–8 minutes.
At first, it will look glossy and translucent.
Then something magical happens.
The mixture begins to turn pale, creamy-looking, and dramatically lighter in texture.
Keep whipping until it becomes thick and fluffy.
Depending on your gelatin and mixer, the exact time can vary.
Texture cue
When you lift the beaters, the mixture should form soft peaks that hold their shape for several seconds.
Don’t expect the exact texture of whipped cream. This is more like an airy gelatin cloud.
8. Portion the dessert
Spoon the fluffy mixture into four small dessert glasses or ramekins.
Smooth the tops with a spoon or leave them rustic and cloud-like.
Honestly, the rustic version is part of the charm.
Cover each serving and refrigerate for at least 1 hour, preferably 2 hours.
9. Serve cold
When you’re ready to serve, take the dessert directly from the refrigerator.
The outside should feel cool and firm while the inside remains soft and delicate.
For a simple finish, serve it exactly as it is.
Sometimes the simplest dessert is the one that disappears first.
Expert Cooking Tips & Mistakes to Avoid
Don’t boil the gelatin
High heat isn’t your friend here.
Bring the water to steaming temperature, dissolve the gelatin, and move on.
Boiling isn’t necessary and can interfere with the final texture.
Don’t whip it while it’s hot
Hot gelatin mixture won’t give you that fluffy consistency.
Give it time to cool and partially thicken before reaching for the mixer.
Don’t over-chill before whipping
If the mixture becomes completely solid, your mixer will struggle.
You’re looking for a soft, thickened gel—not a firm jelly.
Adjust sweetness before chilling
Cold desserts often taste less sweet than warm mixtures.
Taste the mixture before whipping and adjust if necessary.
However, remember that different sweeteners have different levels of sweetness.
Use small serving dishes
This dessert is light, but the presentation makes a huge difference.
Small glasses make the fluffy texture look more luxurious and turn a very simple recipe into something that feels restaurant-worthy.
Variations & Customizations
1. Chocolate-Inspired Version
For a chocolate-flavored variation, use a zero-carb chocolate flavoring rather than ordinary cocoa powder.
Why not simply add cocoa?
Because cocoa contains carbohydrates. If your goal is genuinely zero carbohydrate, flavored extracts or flavorings with verified nutrition information are a better choice.
Add the flavoring gradually until you reach your preferred intensity.
2. Extra-Healthy Version
Keep the ingredient list extremely simple.
Choose:
- Unflavored gelatin
- A sweetener you tolerate well
- Water
- Natural or verified zero-carb flavoring
Avoid unnecessary syrups, toppings, sauces, and carbohydrate-containing garnishes.
Remember, “zero-carb” doesn’t automatically mean “eat unlimited amounts.” Overall dietary quality and portion size still matter.
3. Kids-Friendly Version
Children often enjoy desserts with fun textures.
Serve the vanilla clouds in tiny cups and let them chill completely.
You can also make small spoonful-sized portions in silicone molds for a playful presentation.
For young children, choose the sweetener carefully and follow age-appropriate dietary guidance.
4. Coffee Version
For a grown-up dessert, add a little zero-carb coffee flavoring.
The result has a subtle roasted aroma that pairs beautifully with the sweetness.
Serve it after dinner with unsweetened coffee for an elegant, low-carb finish.
Storage & Reheating Instructions
Refrigerator
Store the dessert covered in the refrigerator.
It is best enjoyed within 2–3 days.
The texture may gradually become firmer over time, so it is at its fluffiest during the first day or two.
Freezer
Freezing isn’t recommended if you want the original airy texture.
Gelatin-based desserts can become watery or slightly rubbery after freezing and thawing.
If you absolutely need to freeze it, place individual portions in airtight freezer-safe containers and thaw them slowly in the refrigerator.
Expect some texture changes.
Reheating
Don’t reheat this dessert.
It is designed to be served cold.
If it becomes extremely firm, simply let it sit at room temperature for 5–10 minutes before eating.
Serving Suggestions
This dessert is intentionally simple, so presentation can make it shine.
Try serving it with:
- A few mint leaves
- Unsweetened herbal tea
- Black coffee
- Espresso
- A dusting of a verified zero-carb flavored sweetener
- A tiny drizzle of a verified zero-carb dessert sauce
For strict zero-carb eating, be careful with traditional toppings.
Fresh berries, chocolate chips, whipped cream, coconut, nuts, and sauces may all add carbohydrates.
Sometimes, a beautiful chilled glass and a small spoon are all you need.
Frequently Asked Questions
1. Is this dessert really zero carbs?
It can be 0 g carbohydrate per serving when you use gelatin, sweetener, and flavoring products that are labeled at zero carbohydrate and contain no hidden carbohydrate fillers.
Always check the nutrition label of your specific brands.
2. Is this dessert keto-friendly?
Yes.
The recipe is designed specifically around ingredients that can fit a very low-carbohydrate ketogenic diet.
However, individual keto plans vary, so always account for your personal nutritional requirements.
3. Can I use regular sugar?
You can, but then it is no longer a zero-carb dessert.
Sugar contains carbohydrates, so use an appropriate zero-carb sweetener if keeping carbohydrates at zero is your goal.
4. Can I use honey or maple syrup?
Not if you’re trying to maintain a zero-carb recipe.
Honey and maple syrup are carbohydrate-rich sweeteners.
5. Why didn’t my dessert become fluffy?
The most common causes are temperature and timing.
If the gelatin mixture was too hot when whipped, it may not aerate properly.
If it was completely set before whipping, it can also be difficult to transform into a cloud-like texture.
Aim for a cool, thickened, soft-gel consistency.
6. Can I make this dessert without gelatin?
Not with this exact recipe.
Gelatin provides both the structure and the distinctive airy texture.
You could experiment with agar-agar, but it behaves differently and may produce a firmer, less fluffy result.
7. Can I make it dairy-free?
Yes—and that’s one of the easiest things about this recipe.
There is no milk, butter, cream, or cheese in the base.
Simply make sure your flavoring and sweetener are also dairy-free if you need to avoid dairy completely.
Final Thoughts: Your Sweet Tooth Just Got Easier
There is something incredibly satisfying about opening the refrigerator and finding dessert waiting for you.
No complicated baking.
No flour-covered kitchen.
No sugar crash from a traditional cake.
Just a cool, delicate vanilla cloud with a soft texture and enough sweetness to make the end of your meal feel special.
And that’s really what good dessert should do.
It doesn’t have to be complicated.
It doesn’t need twenty ingredients.
Sometimes, the most satisfying recipes are the ones that quietly solve a very specific problem: you want something sweet, but you don’t want to abandon your goals.
So grab your gelatin, choose your favorite zero-carb sweetener, and give this fluffy little dessert a try.
If you make it, leave a comment and let me know which flavor you used. Did you go classic vanilla, coffee, chocolate-inspired, or something completely different?
And if this recipe helped satisfy your sweet tooth, share it with someone who is always looking for delicious low-carb dessert ideas.