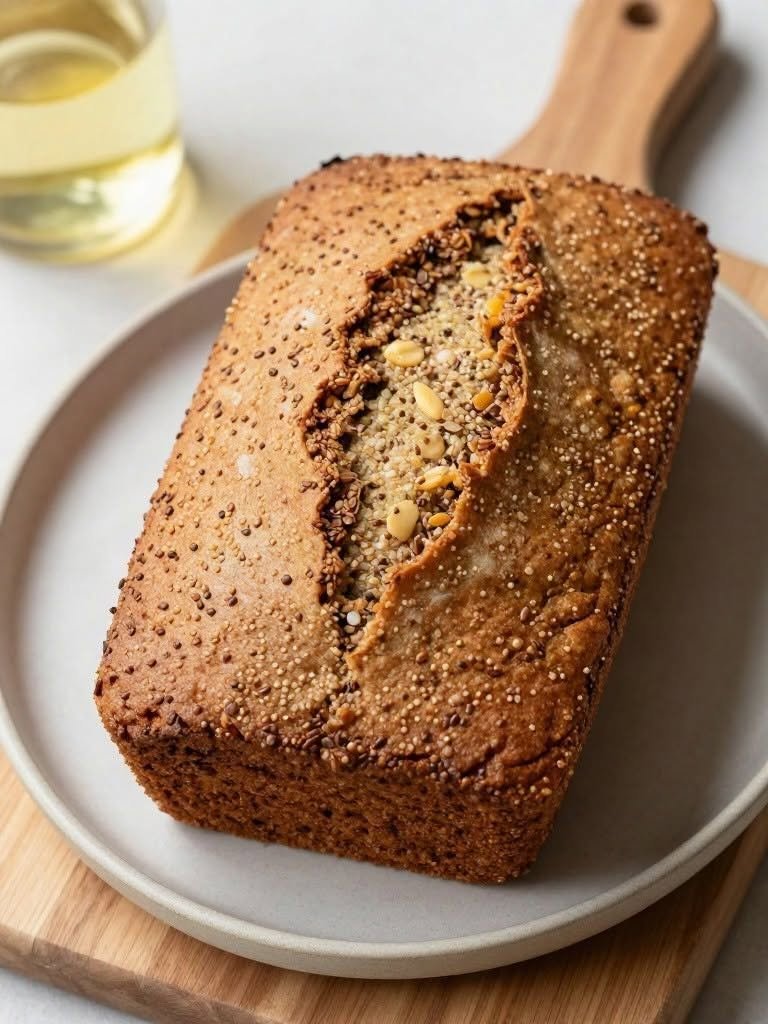
Chia Seed Loaf: A Wholesome Homemade Bread You’ll Want to Bake Again and Again
There’s something deeply comforting about a loaf of bread coming out of the oven.
The crust crackles softly as it cools, the kitchen fills with a warm, nutty aroma, and the first slice is still slightly warm when you spread it with butter, avocado, or your favorite nut butter. Now imagine all of that goodness with the delicate crunch of chia seeds tucked into every bite.
That’s exactly what makes this Chia Seed Loaf so special.
It’s hearty without being heavy, pleasantly nutty without needing a mountain of ingredients, and wonderfully versatile. The chia seeds add tiny pops of texture while helping create a tender, satisfying crumb. Toast a slice and the edges become golden and crisp while the center stays soft enough to soak up butter or jam.
I love recipes like this because they make an ordinary morning feel a little more special. Picture a quiet weekend breakfast, a steaming cup of coffee on the table, and a warm slice of homemade chia bread waiting beside it. No elaborate bakery trip required—just a little mixing, some patience, and the irresistible aroma of bread baking in your own kitchen.
If you’re searching for an easy chia seed loaf recipe, this wholesome version is a wonderful place to start.
Why You’ll Love This Chia Seed Loaf
- Easy to make: Simple ingredients and straightforward preparation.
- Nutritious: Chia seeds contribute fiber, plant-based protein, and minerals.
- High in texture: The seeds give every slice a satisfying little crunch.
- Great for breakfast: Delicious toasted with fruit, nut butter, or eggs.
- Naturally dairy-free: This recipe uses plant-based ingredients.
- Vegan: No eggs, milk, or butter are required.
- Budget-friendly: Most ingredients are pantry staples.
- Make-ahead friendly: The loaf stores and freezes beautifully.
- Customizable: Add herbs, seeds, spices, nuts, or dried fruit.
- Family-friendly: The mild flavor makes it easy to pair with sweet or savory toppings.
Ingredients for Chia Seed Loaf
This recipe makes 1 loaf, approximately 10–12 slices.
Main Ingredients
- 2 cups (240 g / 8.5 oz) whole-wheat flour
- 1 cup (120 g / 4.2 oz) all-purpose flour
- ¼ cup (40 g / 1.4 oz) chia seeds
- 2 tablespoons (30 ml / 1 fl oz) olive oil
- 2 tablespoons (30 ml / 1 fl oz) maple syrup
- 1½ cups (360 ml / 12 fl oz) warm water
- 2¼ teaspoons (7 g / ¼ oz) active dry yeast
- 1 teaspoon (6 g / 0.2 oz) fine salt
Optional Topping
- 1 tablespoon chia seeds
- 1 tablespoon sesame seeds
- 1 tablespoon sunflower seeds
- A few rolled oats
The toppings aren’t necessary, but they give the loaf a beautiful bakery-style appearance and an extra layer of crunch.
Healthy Ingredient Substitutes
Whole-Wheat Flour
You can replace some or all of the whole-wheat flour with bread flour for a lighter loaf. Keep in mind that whole-wheat flour provides a heartier flavor and denser texture.
Maple Syrup
Use honey if you don’t need the loaf to be vegan. You can also use a small amount of sugar or another liquid sweetener.
Olive Oil
Avocado oil works well as a neutral alternative.
Chia Seeds
For the characteristic chia seed texture and nutrition, it’s best to keep the chia seeds. However, you can supplement them with flaxseed, sunflower seeds, or pumpkin seeds.
Nutritional Information Per Serving
The following is an approximate estimate based on 12 slices per loaf, before optional toppings.
- Calories: approximately 150–165
- Protein: approximately 5 g
- Carbohydrates: approximately 25–28 g
- Fat: approximately 4–5 g
- Fiber: approximately 4–5 g
- Sugar: approximately 2–3 g
Chia seeds contribute omega-3 fatty acids (ALA), calcium, magnesium, manganese, phosphorus, and fiber, while whole-wheat flour adds additional fiber and several B vitamins.
Dietary Information
- Vegan: Yes
- Dairy-free: Yes
- Egg-free: Yes
- Gluten-free: No, because this recipe contains wheat flour
- Keto: No, because the loaf contains wheat flour and a significant amount of carbohydrates
- Vegetarian: Yes
For a gluten-free version, use a tested gluten-free bread-flour blend designed for yeast baking. Results will vary depending on the blend.
Kitchen Tools Needed
You don’t need a fancy bread-making setup.
You’ll need:
- Large mixing bowl
- Small bowl or measuring jug
- Measuring cups and spoons
- Kitchen scale, recommended
- Wooden spoon or sturdy spatula
- 9 × 5-inch loaf pan
- Clean kitchen towel
- Pastry brush, optional
- Cooling rack
- Serrated bread knife
A kitchen scale is especially useful when baking because flour can vary considerably when measured by volume.
How to Make Chia Seed Loaf
Step 1: Activate the Yeast
Pour 1½ cups (360 ml) warm water into a small bowl or measuring jug.
The water should feel comfortably warm rather than hot—approximately 100–110°F (38–43°C).
Stir in the 2 tablespoons maple syrup and sprinkle the 7 g active dry yeast over the surface.
Let it stand for 5–10 minutes.
You should see a light layer of foam developing on top.
That foam is a good sign that the yeast is active.
Pro tip: Water that’s too hot can damage yeast. When in doubt, slightly cooler is safer than scalding hot.
Step 2: Combine the Dry Ingredients
While the yeast activates, add the following to a large mixing bowl:
- 2 cups whole-wheat flour
- 1 cup all-purpose flour
- ¼ cup chia seeds
- 1 teaspoon salt
Whisk or stir everything together.
Distributing the chia seeds throughout the flour now helps prevent them from clumping together later.
Step 3: Add the Wet Ingredients
Pour the activated yeast mixture into the dry ingredients.
Add 2 tablespoons olive oil.
Using a sturdy wooden spoon or spatula, stir until a shaggy dough forms.
At first, the mixture may look rough and slightly sticky.
That’s normal.
Chia seeds absorb liquid as they sit, so the dough will gradually become more cohesive.
Step 4: Knead the Dough
Transfer the dough to a lightly floured work surface.
Knead for approximately 7–10 minutes.
Push the dough away from you with the heel of your hand, fold it back, rotate it, and repeat.
The dough should gradually become smoother and more elastic.
It may remain slightly tacky because of the whole-wheat flour and chia seeds, but it shouldn’t feel like wet batter.
Pro tip: Resist the temptation to add lots of extra flour. Too much flour can produce a dry, heavy loaf.
If the dough is extremely sticky, add flour 1 tablespoon at a time until manageable.
Step 5: First Rise
Place the kneaded dough into a lightly oiled bowl.
Turn it once so the surface gets a thin coating of oil.
Cover the bowl with a clean kitchen towel or plastic wrap.
Place it somewhere warm and draft-free.
Let the dough rise for approximately 60–90 minutes, or until it has increased noticeably in size—ideally close to doubled.
The exact time depends on room temperature.
A warm kitchen may take only an hour, while a cooler room can take longer.
Step 6: Shape the Loaf
Once the dough has risen, gently press it down to release excess air.
Turn it onto a lightly floured surface.
Shape it into a rough rectangle, then roll it firmly into a loaf, tucking the ends underneath.
Place it seam-side down into a greased 9 × 5-inch loaf pan.
Don’t worry if it isn’t perfectly shaped. The second rise will help smooth it out.
Step 7: Let It Rise Again
Cover the pan loosely and let the dough rise for another 30–45 minutes.
It should become visibly puffier and rise toward the top of the pan.
A gentle fingertip press should leave a slight indentation that slowly springs back.
That’s your cue that the loaf is ready for the oven.
Step 8: Add the Topping
Preheat your oven to 375°F (190°C).
For a beautiful seeded crust, lightly brush the top of the loaf with water or olive oil.
Sprinkle with additional chia seeds, sesame seeds, sunflower seeds, or oats.
Press the seeds very gently so they adhere.
Step 9: Bake
Place the loaf in the center of the preheated oven.
Bake for approximately 35–45 minutes.
The top should be deeply golden brown, and the loaf should sound hollow when gently tapped.
If you have an instant-read thermometer, the center should generally reach around 190–200°F (88–93°C).
If the top browns too quickly, loosely cover it with aluminum foil for the final portion of baking.
Step 10: Cool Completely
This step requires patience.
Remove the loaf from the pan and place it on a cooling rack.
Allow it to cool for at least 1 hour before slicing.
Cutting into very hot bread can compress the crumb and make the center appear gummy.
Once cooled, use a serrated knife to cut clean, even slices.
That first warm slice is your reward for waiting.
Expert Cooking Tips & Mistakes to Avoid
Don’t Use Water That’s Too Hot
Very hot water can interfere with yeast activity.
Aim for pleasantly warm water rather than steaming water.
Don’t Rush the Rising Time
Bread dough doesn’t always follow the clock.
If your kitchen is cool, the first rise may take longer than 60 minutes.
Look at the dough rather than the timer.
Avoid Adding Too Much Flour
This is one of the biggest mistakes when making homemade bread.
A slightly tacky dough can produce a soft loaf. A heavily floured dough can become dense and dry.
Give the Loaf Enough Time to Cool
As bread cools, the interior continues to set.
Slice too soon and you risk a gummy or compressed center.
Measure Flour Carefully
For the most consistent results, weigh your flour.
If using measuring cups, spoon flour gently into the cup and level it instead of scooping directly from the flour bag.
Watch the Chia Seeds
Chia seeds absorb water and can make dough feel firmer as it rests.
If your dough seems unusually dry after a few minutes, add warm water 1 teaspoon at a time until it becomes workable.
Variations and Customizations
Spicy Chia Seed Loaf
For a savory loaf with a little heat, add:
- ½ teaspoon chili flakes
- ½ teaspoon garlic powder
- ½ teaspoon smoked paprika
- 1 tablespoon chopped fresh rosemary
This version is fantastic alongside soups and stews.
Extra-Healthy Seeded Loaf
Create a nutrient-packed seed loaf by adding:
- 2 tablespoons sunflower seeds
- 2 tablespoons pumpkin seeds
- 1 tablespoon ground flaxseed
- 1 tablespoon sesame seeds
Keep the total added seeds moderate so the dough remains light enough to rise properly.
Kids-Friendly Chia Bread
For children who aren’t sure about seeds, reduce the visible topping and use finely ground chia seeds instead of whole chia seeds.
Serve toasted with peanut butter, almond butter, banana slices, or a thin layer of fruit spread.
The mild, nutty flavor pairs beautifully with naturally sweet toppings.
Cinnamon Raisin Chia Loaf
Turn this into a breakfast treat by adding:
- 1 teaspoon cinnamon
- ½ cup raisins
- 1 tablespoon maple syrup
For extra warmth, add a pinch of nutmeg.
Storage and Reheating Instructions
Room Temperature
Once completely cool, store the loaf in an airtight bread bag or container.
It should remain enjoyable for approximately 2–3 days at room temperature.
Avoid storing homemade bread in the refrigerator unless necessary. Refrigeration can make bread become stale more quickly.
Refrigerator
If your kitchen is particularly warm or humid, refrigerating the loaf can help extend its usable life.
Wrap it tightly first to prevent it from drying out.
Freezer
This loaf freezes very well.
For convenient breakfasts, slice the completely cooled loaf before freezing.
Place parchment paper between slices and store them in a freezer-safe bag or container for up to 2–3 months for best quality.
Best Reheating Method
For individual frozen slices, toast directly from frozen.
For a softer slice, warm it in a toaster oven at approximately 325°F (165°C) for several minutes.
Avoid microwaving for too long, as bread can become chewy.
Serving Suggestions
This chia seed loaf is one of those recipes that can travel effortlessly from breakfast to dinner.
For Breakfast
Try a toasted slice with:
- Avocado and a pinch of sea salt
- Peanut or almond butter
- Banana and cinnamon
- Cream cheese and berries
- Butter and honey
- Scrambled eggs
For Lunch
Use it for sandwiches with:
- Turkey and avocado
- Hummus and roasted vegetables
- Egg salad
- Grilled chicken
- Tomato, cucumber, and greens
For Dinner
Serve warm slices alongside:
- Tomato soup
- Lentil soup
- Vegetable stew
- Chicken soup
- Salads
The hearty texture makes it particularly satisfying with soups because it holds up well when dipped into a rich, savory broth.
Frequently Asked Questions
1. Can I make chia seed loaf without yeast?
Yes, but it becomes a different style of bread.
A yeast-free chia loaf can be made with baking powder or baking soda, but it will generally have a denser, more cake-like crumb rather than the chewy structure of traditional yeast bread.
2. Can I use ground chia seeds?
Absolutely.
Ground chia seeds create a more uniform texture and can be useful if you don’t enjoy the appearance or crunch of whole seeds.
Keep in mind that ground chia may absorb liquid somewhat differently, so adjust the water gradually if necessary.
3. Why is my chia seed bread dense?
Several things can cause dense bread: inactive yeast, insufficient rising time, too much flour, or cutting the loaf before it has cooled.
Make sure your yeast becomes foamy during activation and give the dough enough time to rise.
4. Can I make this loaf gluten-free?
Yes, with modifications.
Replace the wheat flours with a reliable gluten-free bread flour blend formulated for yeast baking. Gluten-free dough behaves differently and may require additional binders or hydration depending on the blend.
5. Can I make the dough ahead of time?
Yes.
You can prepare the dough, cover it well, and refrigerate it for a slower rise. Allow additional time for the dough to warm and become properly puffy before baking.
6. How do I know when the bread is fully baked?
The crust should be golden brown and firm, and the loaf should sound hollow when tapped.
For the most reliable result, check the internal temperature with an instant-read thermometer. Aim for approximately 190–200°F (88–93°C) in the center.
7. Can I toast chia seed bread?
Absolutely—and this may be one of the best ways to enjoy it.
Toasting makes the crust wonderfully crisp, brings out the nutty aroma of the seeds, and creates a warm contrast against creamy toppings.
Final Thoughts
There are few things as satisfying as making bread from scratch.
You start with flour, water, yeast, and a handful of chia seeds. Nothing glamorous. Nothing complicated. But after a little kneading and a couple of patient rises, you end up with a golden loaf that smells like home.
The crust is crisp.
The center is soft and hearty.
The chia seeds add a delicate nuttiness and satisfying texture.
And when that first slice hits the toaster and fills the kitchen with the aroma of warm grains and toasted seeds, you’ll understand why homemade bread is worth the effort.
Whether you’re making sandwiches for the week, preparing a wholesome breakfast, or simply craving a slice of something warm and homemade, this Chia Seed Loaf deserves a place in your recipe collection.
So grab your flour, wake up that yeast, and let your kitchen become the coziest room in the house.
Bake a loaf, slice it thick, and enjoy it your way.
If you try this recipe, leave a comment with your favorite topping or variation—and don’t forget to share the recipe with another bread lover who would enjoy a warm, homemade loaf straight from the oven.